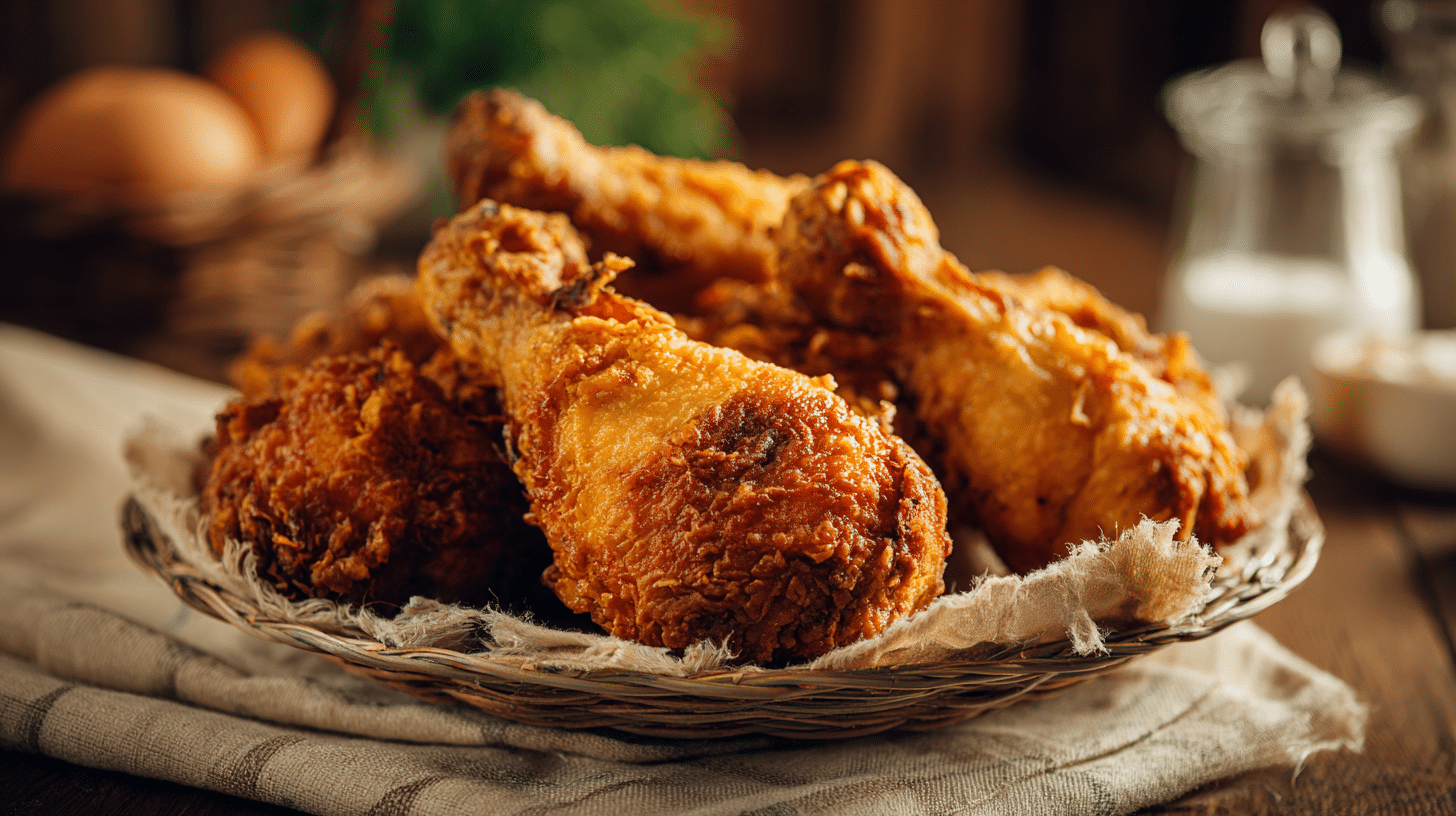
The Ultimate Fried Chicken Recipe Guide: 10 Mouthwatering Styles & Pro Tips for Perfect Crispy Chicken at Home
This article is your one-stop shop for mastering the art of frying chicken at home. From choosing the right cuts and spices to nailing that golden-brown crust every time, we’ve got you covered. You’ll discover secret tips, regional twists like Korean and Nashville hot, how to store leftovers without losing crunch, and even vegan options for those who skip meat. Whether you’re a seasoned chef or just starting out, this guide will help you fry up some serious flavor without burning your budget—or your kitchen.
Part 1: Introduction to Fried Chicken Recipe
The Ultimate Guide to Making the Best Fried Chicken Recipe at Home
What Is Fried Chicken ?
When someone says “comfort food,” chances are fried chicken comes to mind. Crispy on the outside, juicy on the inside—it’s a dish that brings people together, whether it’s Sunday dinner, a backyard cookout, or a late-night snack after a long day. But where did this beloved dish come from?
Believe it or not, fried chicken has roots all over the world. While it’s famously associated with Southern U.S. cuisine, similar versions exist in Korean (yangnyeom chicken ), Japanese (karaage ), and even Indian street food. Each culture puts its own spin on it, but the core idea remains the same—coated chicken, deep-fried to perfection.
Back in the American South, fried chicken recipes were passed down through generations, often served during celebrations or gatherings. It became more than just food—it was tradition. Today, thanks to modern kitchens and easy access to ingredients, making fried chicken at home isn’t just possible—it’s downright fun.
Why Make Your Own Fried Chicken ?
Let’s be real—fast food fried chicken can be tasty, sure, but it often comes with a side of guilt (and grease). That’s where whipping up your own homemade fried chicken shines. For starters, you’re in control of what goes into it. Want less salt? Less oil? No mystery ingredients? Done.
Plus, think about the cost. Sure, buying a bucket might seem convenient, but over time, it adds up. With a solid fried chicken recipe , you’ll save money while enjoying restaurant-level flavor. And let’s not forget the bragging rights—you made that crispy, golden goodness yourself!
Then there’s the customization factor. Love spice? Toss in some cayenne or paprika. Prefer a tangy kick? Marinate in buttermilk or vinegar. Want extra crunch? Double-dip that coating. When you make fried chicken from scratch, you call the shots.
So whether you’re feeding a crowd or just craving something warm and satisfying, learning how to perfect your own fried chicken recipe is worth every second. Ready to roll up your sleeves and dive into the next step?
Part 2: Ingredients & Tools You’ll Need
Essential Ingredients for a Perfect Fried Chicken Recipe
Alright, so you’re ready to make the kind of fried chicken that makes people stop mid-bite and say, “Whoa.” But before we dive into the frying pan—literally—you need the right stuff in your pantry. Let’s break down what you’ll need to pull off a mouthwatering homemade fried chicken masterpiece.
The Star of the Show – Chicken Pieces
First things first, you need chicken. And not just any chicken—chicken pieces that fry evenly and stay juicy inside. Most folks go with a mix of thighs and drumsticks because they’re flavorful and less likely to dry out. If you’re a white meat lover, bone-in chicken breasts work too, though they do require a bit more attention to avoid overcooking.
Pro tip: Don’t skimp on the skin! It helps seal in moisture and gives you that extra-crispy finish.
The Secret Weapon – Buttermilk
Now, here’s where the magic happens. Soaking your chicken pieces in buttermilk is one of the best ways to tenderize the meat and infuse it with flavor. If you don’t have buttermilk on hand, no worries—you can use regular milk mixed with a splash of vinegar or lemon juice as a substitute. Yogurt also works in a pinch!
This step might seem optional, but trust us—it’s not. The buttermilk soak helps break down proteins, making your fried chicken juicier and more tender than ever.
The Crispy Coating – Flour Types
You wouldn’t wear socks without shoes, and your chicken shouldn’t hit the oil without a good coating. Classic fried chicken recipes usually call for all-purpose flour, but some cooks like to mix in cornstarch or rice flour for an even lighter, crispier crust.
Want something extra crunchy? Try adding a teaspoon of baking powder to your dry ingredients. It creates tiny air bubbles during frying, giving you that restaurant-style crunch without the hassle.
Spice It Up – Spices
Let’s talk seasoning. Salt and pepper are a must, but if you want your fried chicken recipe to stand out from the rest, add a few more spices to the mix. Garlic powder, onion powder, paprika, and cayenne pepper bring depth and warmth. Some folks even throw in a dash of mustard powder or dried herbs like thyme or rosemary for a Southern twist.
Layering flavors is key. Season both the buttermilk marinade and the flour mixture to ensure every bite bursts with flavor.
Optional Add-ins (If You Want to Go All In)
- Hot sauce (for a spicy kick in the brine)
- Egg wash (helps the coating stick better)
- Worcestershire sauce (adds umami richness)
- Dijon mustard (adds tang and helps the crust brown beautifully)
Tools You’ll Need
Okay, now that you’ve got your ingredients lined up, let’s talk tools. Making fried chicken at home doesn’t require fancy gadgets, but having the right equipment makes everything easier—and safer.
- Mixing bowls (one for the brine, one for the flour)
- Deep fryer or heavy-bottomed skillet (cast iron is ideal for even heat distribution)
- Thermometer (to monitor oil temperature)
- Wire rack or paper towels (to drain excess oil after frying)
- Tongs (for flipping the chicken safely)
Once you’ve gathered everything, you’re ready to move on to the fun part—actually preparing your fried chicken recipe . In Part 3 , we’ll walk you through each step of the process, from marinating to frying, so you can get that perfect golden crust and juicy interior. Stay tuned!
Part 3: Step-by-Step Fried Chicken Recipe
How to Make the Best Fried Chicken at Home
Alright, time to roll up those sleeves and turn that pile of ingredients into crispy, golden goodness. This section walks you through the entire fried chicken recipe , step by step. Whether this is your first time or you’re brushing up on your skills, follow along closely—we promise it’s worth it.
Step 1: Preparing the Chicken Pieces
Start by choosing your preferred cuts. As mentioned earlier, bone-in thighs and drumsticks are ideal for juicy results. Rinse them under cold water and pat them dry with paper towels. Why dry? Because wet chicken = splattering oil = kitchen chaos.
Now comes the buttermilk marinade . In a large bowl or resealable bag, combine:
- 2 cups buttermilk
- 1 tbsp hot sauce (optional)
- 1 tsp garlic powder
- 1 tsp salt
Toss in your chicken pieces , making sure they’re fully submerged. Cover and refrigerate for at least 2 hours—or ideally overnight. This isn’t just about flavor; the acid in the buttermilk gently breaks down the meat, keeping it moist and tender.
Step 2: Prepping the Coating
While your chicken chills, prep your flour mixture . In another bowl, whisk together:
- 2 cups all-purpose flour
- 1 cup cornstarch (for extra crispiness)
- 1 tsp baking powder
- 1 tsp salt
- ½ tsp black pepper
- ½ tsp paprika
- ½ tsp garlic powder
- ¼ tsp cayenne pepper (for a little heat)
Mix well until everything’s evenly distributed. If you want a thicker crust, feel free to double-dip later—but more on that in a bit.
Step 3: Dredging the Chicken Pieces
Time to coat your chicken. Remove the chicken pieces from the buttermilk marinade , letting any excess drip off. Then dredge each piece in the flour mixture , pressing firmly to help the coating stick. Shake off the excess, and place the coated chicken on a wire rack or tray.
For an extra-crunchy finish, dip the chicken back into the buttermilk marinade and then into the flour mixture again. This double-dipping method gives you that thick, shatteringly crisp crust you see in restaurants.
Let the coated chicken rest for about 10–15 minutes. This allows the coating to set, which means it won’t fall off when you drop it into the hot oil.
Step 4: Frying the Chicken
Heat your oil in a deep skillet or Dutch oven. Fill it about 2 inches deep with a high-smoke-point oil like peanut, vegetable, or canola. Attach a thermometer to the side of the pan and bring the oil to around 350°F.
Once the oil hits temperature, carefully lower in the chicken pieces using tongs. Don’t overcrowd the pan—fry in batches if needed. Overcrowding lowers the oil temperature and leads to greasy, soggy chicken. No bueno.
Cook each side for about 6–8 minutes, depending on the size of the piece. Thighs and drumsticks will take a bit longer than smaller cuts. Flip once—no constant flipping! You want that crust to form properly.
Use a meat thermometer to check for doneness. The internal temperature should read at least 165°F. If you don’t have a thermometer, cut into the thickest part—if the juices run clear and there’s no pink, you’re good to go.
Step 5: Resting and Serving Your Fried Chicken
Once done, transfer the fried chicken to a wire rack placed over a baking sheet or onto paper towels to drain excess oil. Letting it rest for 5–10 minutes helps the juices redistribute, keeping your chicken nice and juicy.
Serve it up with mashed potatoes, coleslaw, biscuits, or pickles—whatever floats your boat. And if you’re feeling extra fancy, drizzle on some honey or hot sauce for a sweet-and-spicy combo.
Now that you’ve mastered the basic fried chicken recipe , you might be wondering—can I switch things up? Of course you can! In Part 4 , we’ll explore different regional styles and modern twists on this classic dish. From Korean to Nashville hot, you won’t believe how many ways you can enjoy fried chicken .
Part 4: Variations of Fried Chicken Recipes
Regional and Cultural Twists on Fried Chicken
So far, we’ve walked through a classic fried chicken recipe that’s crispy, juicy, and totally satisfying. But here’s the thing—fried chicken isn’t just one-size-fits-all. Across the globe, cultures have put their own delicious spins on this beloved dish, giving rise to unique styles that are worth exploring.
Whether you’re looking to impress guests, spice up your weeknight dinners, or just try something new, these variations will expand your fried chicken horizons . Let’s dive into some of the most popular and mouthwatering takes on fried chicken recipes .
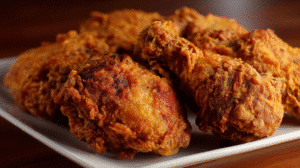
Southern Fried Chicken
Let’s start with the OG—Southern fried chicken . This version is rich in history and flavor. It typically involves soaking chicken pieces in a buttermilk marinade , coating them in seasoned flour, and frying in a cast iron skillet for that signature crispy crust.
The secret? A blend of spices including paprika, garlic powder, and black pepper. Some recipes even call for a sprinkle of cayenne or a dash of hot sauce in the marinade for extra depth.
Perfect for family dinners, potlucks, or rainy Sundays, Southern fried chicken is comfort food at its finest.
Korean Fried Chicken (Yangnyeom Chicken )
Next up is Korean fried chicken , known for its ultra-crispy double-fried texture and addictive sauces. Unlike traditional fried chicken recipes , Korean style often uses boneless chicken or thinly sliced pieces for faster frying.
After the first fry, the chicken is cooled slightly before being fried again at a higher temperature to create that shatteringly crisp exterior. Then it’s tossed in a sticky, sweet-spicy glaze made from gochujang (Korean chili paste), soy sauce, garlic, and sugar.
Serve with pickled radish and a cold soda for that authentic Korean street food vibe.
Japanese Karaage
Karaage is the Japanese take on fried chicken , and it’s wildly popular across Asia. What sets it apart is the marination technique and the use of potato starch or cornstarch instead of flour, which gives it a lighter, crispier texture.
The chicken is cut into bite-sized pieces and marinated in a mix of soy sauce, ginger, garlic, and sesame oil. Then it’s lightly dusted in starch and fried until golden and irresistibly crunchy.
Karaage is often served with a squeeze of lemon or a dollop of Japanese mayo for dipping.
Nashville Hot Chicken
If you love a little heat, Nashville hot chicken is calling your name. This fiery variation starts with a spicy paste made from cayenne, lard, and other seasonings, which is rubbed onto the chicken before frying.
After frying, the chicken gets brushed with more of that spicy oil, giving it a red-hot glow and a fiery kick. It’s traditionally served on a slice of white bread with a few dill pickle chips to balance the heat.
Warning: this one’s not for the faint of heart!
Air Fryer Fried Chicken
For those who want all the flavor with less oil, air fryer fried chicken is a game-changer. Using an air fryer, you can achieve that crispy coating without deep frying.
The trick is to use a light egg wash and a seasoned breadcrumb or flour mixture. Cook at 375°F for about 18–20 minutes, flipping halfway through.
It’s healthier, easier to clean up, and still delivers that satisfying crunch.
Gluten-Free Fried Chicken
Going gluten-free doesn’t mean missing out on fried chicken . Simply swap out regular flour for a gluten-free all-purpose blend or a mix of rice flour and cornstarch.
Be sure to check your seasoning blends and sauces to ensure they’re gluten-free as well. With a few easy swaps, everyone can enjoy a plate of crispy, golden fried chicken .
Vegan Fried Chicken
Yep, even vegans can get in on the fried chicken action . Made from tofu, seitan, or cauliflower, vegan fried chicken uses plant-based marinades and coatings to mimic the texture and taste of real chicken.
Try marinating cauliflower florets in a buttermilk marinade made with non-dairy milk and apple cider vinegar, then coat in a spiced flour mix and fry until golden.
It’s crispy, savory, and seriously addictive—even meat lovers won’t mind skipping the chicken for this one.
With so many delicious variations to choose from, you’ll never run out of ways to enjoy fried chicken recipes . In Part 5 , we’ll share pro tips and tricks to help you nail that perfect crunch and juiciness every single time.
Part 5: Tips and Tricks for Perfect Fried Chicken
Secrets to Achieving Crispy, Juicy Fried Chicken Every Time
Alright, so you’ve got your ingredients ready, your batter mixed, and your oil heated—now it’s time to make sure everything goes off without a hitch. Because let’s be honest, nothing kills the vibe faster than soggy crust or dry meat. In this part, we’re dishing out all the pro tips and tricks that separate amateur batches from restaurant-worthy fried chicken recipes .
Use the Right Oil
First things first—what kind of oil are you using? This might seem like a small detail, but it’s huge. You need an oil with a high smoke point, which means it can handle the heat without burning. Peanut oil is a favorite among Southern chefs, but if you’re looking for something more budget-friendly, vegetable oil or canola oil work just as well.
And here’s a little bonus: don’t be afraid to reuse oil (as long as it’s filtered and not too dark). Just store it in a cool, dark place and use it again for your next batch of fried chicken at home .
Maintain Consistent Temperature
This one’s crucial. If there’s one thing that ruins fried chicken faster than anything else, it’s inconsistent oil temperature. Too hot, and the outside burns before the inside cooks. Too cool, and your coating absorbs way too much grease, leaving you with a sad, greasy mess.
Use a thermometer to keep the oil between 325°F and 375°F , depending on the size of your chicken pieces . And remember: when you add the chicken, the temperature will drop slightly, so adjust accordingly.
Don’t Skip the Brine
You might think marinating chicken is extra work, but trust us—it’s worth it. A buttermilk marinade doesn’t just add flavor; it also tenderizes the meat and helps the coating stick better. If you really want to go all in, throw in some garlic, herbs, or even hot sauce for a flavor boost.
If you’re short on time, even a 30-minute soak makes a difference. But overnight? That’s where the magic happens.
Double Frying for Extra Crunch
Ever wonder how restaurants get that ultra-crispy crust that stays crunchy even after sitting for a while? The secret is double frying. After the initial fry, let the chicken rest for a few minutes, then fry again at a higher temperature (around 375°F) for about 30 seconds to a minute per side.
This technique creates a second layer of crunch and locks in moisture. It’s especially popular in Korean fried chicken recipes , where crispiness is king.
Season Generously
Don’t be shy with the spices. Layering flavors throughout the process is key to a memorable fried chicken recipe . Salt the buttermilk marinade , season the flour mix, and even sprinkle a bit more seasoning right after frying while the chicken is still hot.
Remember: salt enhances flavor, and a good spice blend brings warmth and depth. Go ahead—be bold.
Let It Rest
We know, we know—you’re hungry. But resist the urge to dive in the second it hits the rack. Letting your fried chicken rest for 5–10 minutes allows the juices to redistribute, keeping every bite juicy and flavorful.
Place it on a wire rack instead of paper towels to maintain that crispy texture. Paper towels trap steam and soften the crust—no thank you.
With these insider tips under your belt, you’re well on your way to becoming a fried chicken master. But what if things don’t go quite according to plan? In Part 6 , we’ll cover how to store and reheat your leftovers without losing that perfect crunch.
Part 6: Storing and Reheating Fried Chicken
How to Store and Reheat Leftover Fried Chicken
Let’s face it—even the best fried chicken recipe sometimes leaves you with leftovers. Whether you made too much or you’re meal-prepping for the week, knowing how to properly store and reheat your fried chicken can mean the difference between a delicious second serving and a sad, soggy disappointment.
Refrigeration
After frying, allow your fried chicken to cool completely before storing. Place it in an airtight container or wrap each piece individually in foil or plastic wrap. Stored properly, fried chicken lasts in the fridge for up to 3–4 days .
Pro tip: Keep it on a wire rack or layer parchment paper between pieces to prevent condensation from softening the crust.
Freezing
Yes, you can freeze fried chicken —and yes, it can still taste great when reheated. Wrap each piece tightly in plastic wrap, then place them in a freezer-safe bag or container. For best results, label the package with the date and freeze for up to 3 months .
When you’re ready to enjoy it again, thaw the chicken in the refrigerator overnight before reheating.
Best Way to Reheat Fried Chicken
Microwaving might be fast, but it’s the enemy of crispiness. Instead, reach for the oven.
Preheat your oven to 375°F , place the fried chicken on a wire rack over a baking sheet, and bake for 15–20 minutes until hot and crispy again.
If you’re short on time, a toaster oven works wonders, too. Or, for that extra-crispy finish, briefly refry the chicken in hot oil for about 30 seconds per side.
Now that you know how to keep your fried chicken tasting fresh even the next day, let’s talk about what not to do. In Part 7 , we’ll reveal the most common mistakes people make when frying chicken—and how to avoid them.
Part 7: Common Mistakes to Avoid
Top 10 Mistakes People Make When Frying Chicken
Even the best fried chicken recipe can go south if you’re not careful. Over the years, we’ve seen plenty of kitchen disasters—from burnt crusts to rubbery meat. To save you the heartache (and wasted chicken), here are the top 10 mistakes to avoid when making fried chicken at home .
1. Not Drying the Chicken Properly
Wet chicken equals splattering oil and a soggy crust. Always pat your chicken pieces dry before marinating or frying.
2. Using Cold Chicken Straight from the Fridge
Cold chicken dropped into hot oil shocks the crust and causes uneven cooking. Let your chicken sit at room temperature for 20–30 minutes before frying.
3. Oil Not Hot Enough
Patience is key. If the oil isn’t hot enough, your chicken will absorb too much grease and come out greasy and heavy. Use a thermometer to check.
4. Overcrowding the Pan
Too many chicken pieces in the pan at once lowers the oil temperature and leads to uneven frying. Cook in batches if needed.
5. Flipping Too Early or Too Often
Let the crust form before flipping. Constant flipping prevents browning and increases the chance of tearing the coating.
6. Skipping the Seasoning
Season both the buttermilk marinade and the flour mixture. Flavor should never be an afterthought.
7. Using Low-Quality Oil
Cheap oil = bad results. Stick to oils with a high smoke point and neutral flavor.
8. Not Checking Internal Temperature
Don’t guess—use a meat thermometer. Fried chicken is done when it reaches 165°F internally.
9. Not Letting It Rest
Resting ensures juicy meat and a crispier crust. Give it at least 5–10 minutes before cutting in.
10. Improper Coating
Too thick and it falls off. Too thin and it won’t crisp up. Aim for a balanced, well-seasoned flour mix and consider double-dipping for extra crunch.
Avoiding these mistakes will take your fried chicken recipe from okay to outstanding. Still have questions? Don’t worry—we’ve got answers coming up in the FAQs section .
Part 8: Frequently Asked Questions (FAQs)
FAQs About Fried Chicken Recipes
Let’s tackle the questions we hear most often about making fried chicken at home . These answers come straight from real searches and “People Also Ask” sections—so you know they’re legit.
Based on Google’s “People Also Ask” section
Q: What makes fried chicken crispy?
A: A combo of the right flour (like cornstarch or rice flour), proper oil temp (350–375°F), and maybe even a bit of baking powder in the coating. Oh, and don’t forget to let it rest!
Q: Can I use boneless chicken for fried chicken ?
A: Absolutely! Boneless thighs or breasts work great, though they cook faster, so watch the time closely.
Q: Is it better to fry chicken covered or uncovered?
A: Uncovered gives you a crispier crust. Covering traps steam and softens the exterior.
Q: How long should I fry chicken?
A: Around 6–8 minutes per side, depending on the cut. Drumsticks and thighs take a bit longer than smaller pieces.
Q: Can I bake instead of fry chicken?
A: Yep! Toss in egg wash, coat in breadcrumbs or seasoned flour, and bake at 400°F on a wire rack for crispy results.
Q: How do I keep fried chicken warm without getting soggy?
A: Put it on a wire rack in a 200°F oven. No wire rack? Use a baking sheet lined with parchment paper.
Q: Should I soak chicken in milk before frying?
A: Definitely! A buttermilk marinade tenderizes the meat and adds flavor. If you don’t have buttermilk, mix regular milk with vinegar or lemon juice.
Q: What oil is best for frying chicken?
A: Peanut oil, vegetable oil, or canola oil—they all have high smoke points and neutral flavors.
Q: How do you know when fried chicken is done?
A: Internal temp of 165°F or clear juices when you cut into the thickest part.
Q: Why is my fried chicken not crispy?
A: Likely because the oil temp was too low or the flour ratio wasn’t right. Also, skipping the resting period can cause sogginess.
Got more questions? Drop ‘em in the comments—we love hearing from fellow fried chicken lovers.
Conclusion
Mastering the Art of Fried Chicken at Home
So there you have it—a full breakdown of how to make the ultimate fried chicken recipe , from selecting the right ingredients to mastering pro-level techniques and avoiding common pitfalls. Whether you’re going classic with a Southern-style batch or spicing things up with Nashville hot or Korean-inspired glaze, the power is in your hands.
The beauty of fried chicken at home is that it’s endlessly customizable, deeply satisfying, and totally worth the effort. With the right tools, a few simple ingredients, and a handful of insider tips, you’ll be whipping up restaurant-quality batches in no time.
Could you kindly arrange for Dinner?