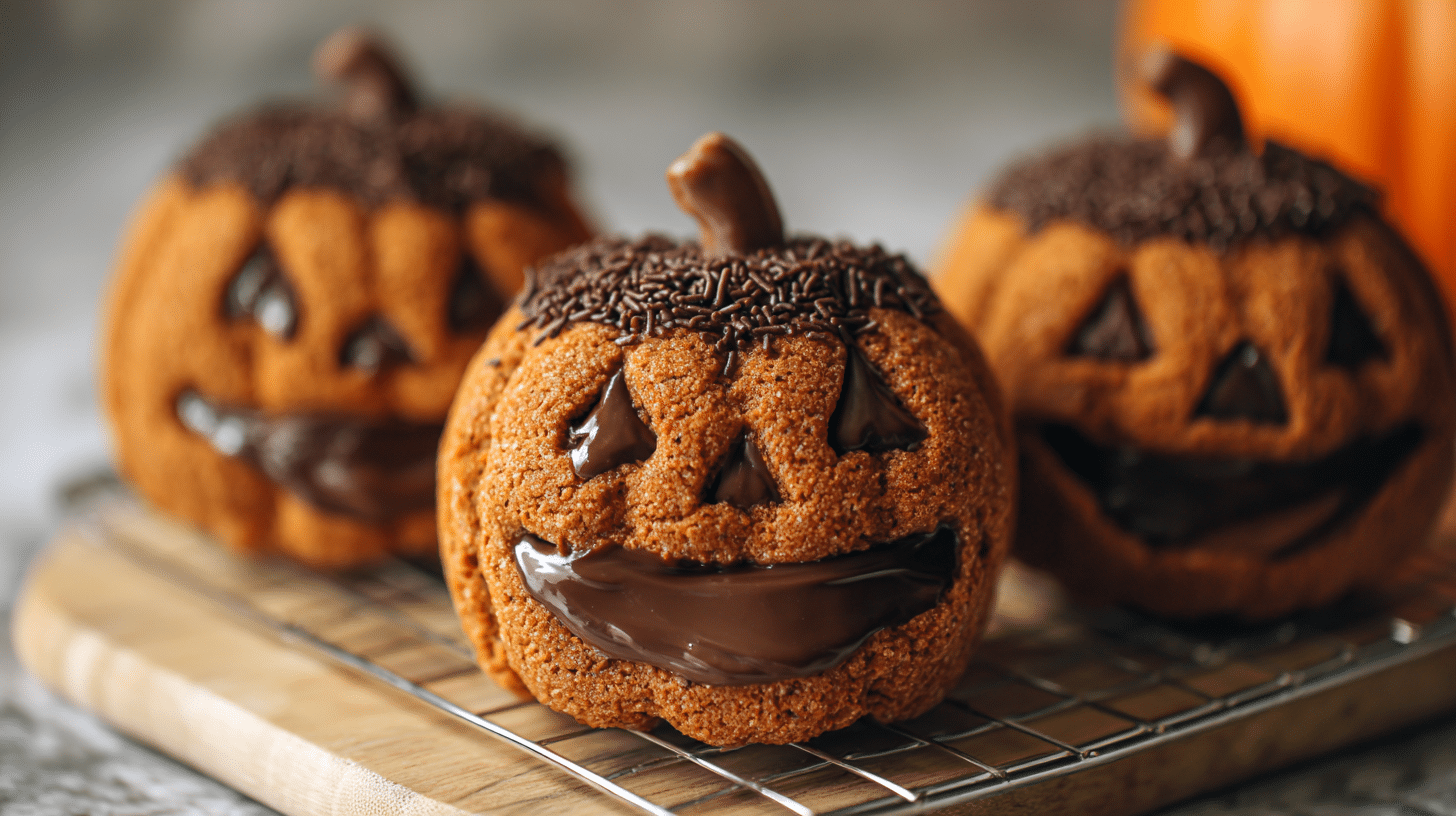
Milk Chocolate Stuffed Jack-O’-Lantern Cookies Recipe
Halloween is the perfect excuse to combine creativity with indulgence, and this Milk Chocolate Stuffed Jack-O’-Lantern Cookies Recipe does exactly that. Imagine biting into a soft, pumpkin-shaped cookie only to find a rich, creamy milk chocolate center that melts in your mouth. Whether you’re baking for kids, a festive party, or just treating yourself, these cookies bring playful fun and irresistible flavor to the table.
From the tender pumpkin-infused dough to the gooey chocolate surprise inside, this recipe combines the art of baking with science, ensuring perfect texture, balanced sweetness, and visually stunning results. By the end of this guide, you’ll know how to make cookies that are not only delicious but also Instagram-worthy—perfect for Halloween displays, trick-or-treat handouts, or cozy fall desserts.
Why You’ll Love This Milk Chocolate Stuffed Jack-O’-Lantern Cookies Recipe
-
Rich Chocolate Surprise: Every bite reveals a creamy milk chocolate center that complements the subtly spiced pumpkin cookie.
-
Soft & Chewy Texture: Achieve the ideal cookie softness through chilling and careful baking techniques.
-
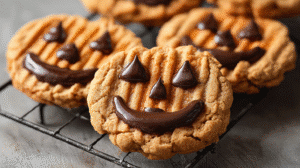
Festive Halloween Design: Carve fun jack-o’-lantern faces for a playful presentation.
-
Customizable Flavors: Optional almond extract and orange gel coloring make it versatile.
-
Kid-Friendly & Family Fun: Great for baking with children during Halloween activities.
-
Make-Ahead Convenience: Dough can be chilled in advance and baked on demand.
-
Impressive Party Treats: Unique presentation that stands out at Halloween parties.
-
Budget-Friendly Ingredients: Uses pantry staples with minimal chocolate investment.
Ingredients for Milk Chocolate Stuffed Jack-O’-Lantern Cookies
Dry Ingredients
-
2¾ cups all-purpose flour
-
½ teaspoon baking powder
-
½ teaspoon salt
Wet Ingredients
-
1 cup unsalted butter, softened
-
1 cup granulated sugar
-
1 large egg
-
1½ teaspoons vanilla extract
-
½ teaspoon almond extract (optional)
-
Orange gel food coloring, a few drops
Filling
-
½ cup milk chocolate chips or squares
-
1 tablespoon heavy cream (optional, for melting chocolate)
Pro Tip: Use high-quality chocolate for melting; it ensures smoother, richer filling. Substitute almond extract with maple or pumpkin spice for flavor variation.
Step-by-Step Instructions
1. Prepare Dry Ingredients
Whisk together flour, baking powder, and salt in a medium bowl. This ensures even leavening and avoids clumps in the dough, giving a uniform texture.
2. Cream Butter and Sugar
Beat softened butter with sugar until light and fluffy. This process incorporates air, which helps cookies rise slightly while staying tender.
3. Add Eggs and Flavorings
Incorporate the egg, vanilla, and almond extract (if using). Mix until smooth. This adds moisture and binds the dough.
4. Incorporate Food Coloring
Add orange gel a few drops at a time until your desired pumpkin-orange hue is achieved. Gel coloring is preferred for intense color without affecting dough consistency.
5. Combine Wet and Dry Mixtures
Gradually mix in the flour blend until soft dough forms. Avoid overmixing to prevent tough cookies.
6. Chill the Dough
Divide dough into two discs, wrap in plastic, and refrigerate for at least 1 hour. Chilling prevents spreading and makes handling easier.
7. Preheat and Prepare Baking Sheets
Preheat oven to 350°F (175°C) and line sheets with parchment paper for even baking.
8. Roll and Cut Cookies
Roll dough to ¼-inch thickness and cut out pumpkin shapes. Carve jack-o’-lantern faces on half for assembly.
9. Assemble Stuffed Cookies
Place solid pumpkin cookie on sheet, add chocolate in the center, top with carved cookie, and seal edges.
10. Bake
Bake for 10–12 minutes until edges are lightly golden. Avoid overbaking to maintain a soft interior.
11. Cool and Store
Cool on sheets for 5 minutes, then transfer to wire racks. Store in airtight containers for up to 5 days.
Pro Tips for Perfect Milk Chocolate Pumpkin Cookies
H3: How to Prevent Chocolate from Seeping Out?
Use chilled dough and gently press edges together with a small amount of water or egg wash for sealing.
H3: Can I Use Dark or White Chocolate Instead?
Yes! Dark chocolate provides a richer contrast; white chocolate offers a sweeter, creamier filling.
H3: How Do I Make the Faces More Detailed?
Use small paring knives or mini cookie cutters. Chill dough slightly if it becomes too soft while carving.
H3: Can I Make Dough Ahead of Time?
Absolutely! Dough can be refrigerated up to 3 days or frozen up to 1 month for future use.
Best Ways to Serve
-
Pair with hot cocoa or pumpkin spice latte for ultimate cozy vibes.
-
Serve at Halloween parties or trick-or-treat events in festive packaging.
Nutrition (Per Cookie, Approximate)
-
Calories: 180 kcal
-
Carbs: 24 g
-
Fat: 9 g
-
Saturated Fat: 5 g
-
Protein: 2 g
-
Sugar: 14 g
-
Fiber: 1 g
Storage & Leftovers
-
Room Temperature: Store in airtight container up to 5 days.
-
Freezing: Freeze unbaked cookies or baked cookies for up to 1 month.
-
Reheating: Warm baked cookies in oven at 300°F (150°C) for 5 minutes to refresh chocolate center.
FAQs
Q1: Can I use pumpkin puree in the dough?
Yes, but reduce wet ingredients slightly to maintain dough consistency.
Q2: What’s the best way to transport these cookies?
Layer cookies with parchment paper in airtight containers to prevent sticking.
Q3: Are these cookies kid-safe for Halloween parties?
Absolutely! Just supervise small children when carving dough.
Q4: Can I make these vegan?
Substitute butter with plant-based margarine, milk chocolate with vegan chocolate, and egg with flax or chia egg.
Variations
-
Spice It Up: Add cinnamon, nutmeg, or pumpkin pie spice to the dough.
-
Mini Version: Make bite-sized cookies for party platters.
-
Chocolate Variations: Try caramel or peanut butter filling instead of milk chocolate.
-
Diet-Friendly: Gluten-free flour blends or sugar substitutes for low-sugar diets.
Conclusion
This Milk Chocolate Stuffed Jack-O’-Lantern Cookies Recipe delivers the perfect combination of festive flair and chocolate indulgence. From carving cute jack-o’-lantern faces to enjoying the gooey chocolate surprise inside, this recipe is sure to impress friends and family. Try it today, snap a photo, and share your spooky baking success!