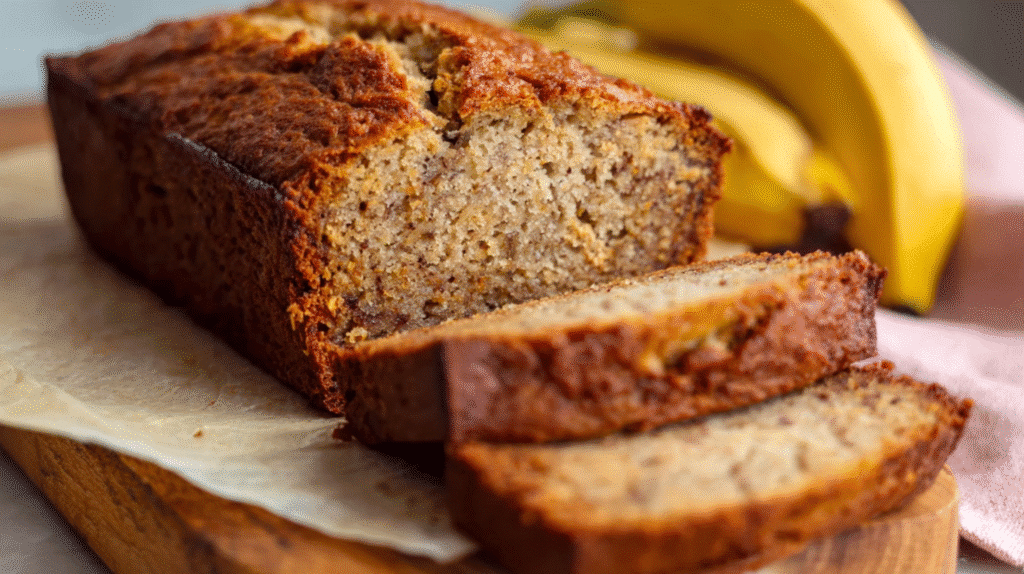
Ultimate 5-Step Bisquick Banana Bread Recipe: Perfect Moist Results Every Time
The Ultimate Guide to Perfect Bisquick Banana Bread
There’s something magical about transforming those overripe bananas sitting on your counter into a warm, fragrant loaf that fills your entire kitchen with comfort. Moreover, when you’re craving homemade goodness but don’t want to spend hours measuring flour and baking powder, Bisquick banana bread recipe becomes your perfect solution. Additionally, this comprehensive bisquick banana bread recipe guide will walk you through everything you need to know about creating the most moist and delicious banana bread using America’s favorite baking mix.
Furthermore, we’ll explore professional tips, troubleshooting techniques, and creative variations that’ll make your neighbors wonder what bakery you’ve been hiding in your kitchen. Meanwhile, whether you’re a complete beginner or an experienced baker looking for a foolproof shortcut, this bisquick banana bread recipe delivers consistent, bakery-quality results every single time.
Part 1: Introduction and Recipe Overview
The Ultimate Bisquick Banana Bread Recipe: Quick, Easy, and Deliciously Moist
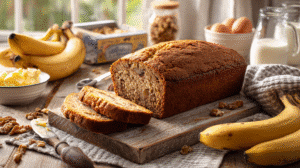
Picture this: you’ve got a bunch of overripe bananas staring at you from the counter, and suddenly you’re craving something warm, sweet, and utterly satisfying. Well, here’s where the magic happens! This bisquick banana bread recipe transforms those spotted bananas into a golden, moist loaf that’s ready in just about an hour from start to finish.
What’s more, you don’t need to be a professional baker to nail this bisquick banana bread recipe. In fact, even if you’ve never made bread before, this foolproof method practically guarantees success. Furthermore, with just a few simple ingredients and one trusty box of Bisquick mix, you’ll be pulling a bakery-quality banana bread from your oven that rivals any coffee shop treat.
Additionally, this isn’t just any ordinary banana bread recipe – it’s specifically designed for busy home bakers who want maximum flavor with minimum fuss. Therefore, if you’re ready to become the hero of your household with the most incredibly moist banana bread, let’s dive right in!
Why Choose Bisquick for Banana Bread?
Now, you might be wondering, “Why use Bisquick instead of making banana bread from scratch?” Well, let me tell you – there are some pretty compelling reasons that’ll make you a believer in this bisquick banana bread recipe approach.
First off, convenience is king when you’re dealing with those rapidly ripening bananas. Instead of measuring out flour, baking powder, and salt separately, Bisquick combines all these dry ingredients in perfectly balanced proportions. Consequently, you’ll save time and eliminate the guesswork that often leads to baking disasters.
Moreover, Bisquick contains built-in leavening agents that ensure your banana bread rises beautifully every single time. Additionally, the consistency of commercial baking mixes means you’ll get the same delicious results whether it’s your first attempt or your fiftieth.
Furthermore, for beginner bakers who might feel intimidated by traditional recipes, this easy banana bread approach builds confidence. Meanwhile, experienced bakers appreciate the reliable results when they need a quick treat for unexpected guests or a last-minute bake sale contribution.
What Makes This Recipe Special
Here’s the thing about this particular bisquick banana bread recipe – it’s been perfected through countless kitchen tests to deliver exactly what you’re craving. Unlike some banana bread recipes that turn out dense or dry, this version consistently produces a tender, moist crumb that practically melts in your mouth.
Additionally, the beauty of using Bisquick lies in its versatility. For instance, you can easily customize this base recipe with nuts, chocolate chips, or spices without worrying about throwing off the ingredient ratios. Furthermore, the baking mix provides a slightly different texture than traditional banana bread – it’s more tender and cake-like while still maintaining that classic banana bread flavor you love.
What’s more, this recipe strikes the perfect balance between quick preparation and exceptional taste. In other words, you’re not sacrificing quality for convenience. Meanwhile, the foolproof nature of this recipe means you can confidently share it with friends and family, knowing they’ll achieve the same amazing results in their own kitchens.
Therefore, whether you’re looking for a reliable go-to recipe or want to impress someone special with your baking skills, this moist banana bread delivers on every front!
Part 2: Ingredients and Equipment
Essential Ingredients for Perfect Bisquick Banana Bread
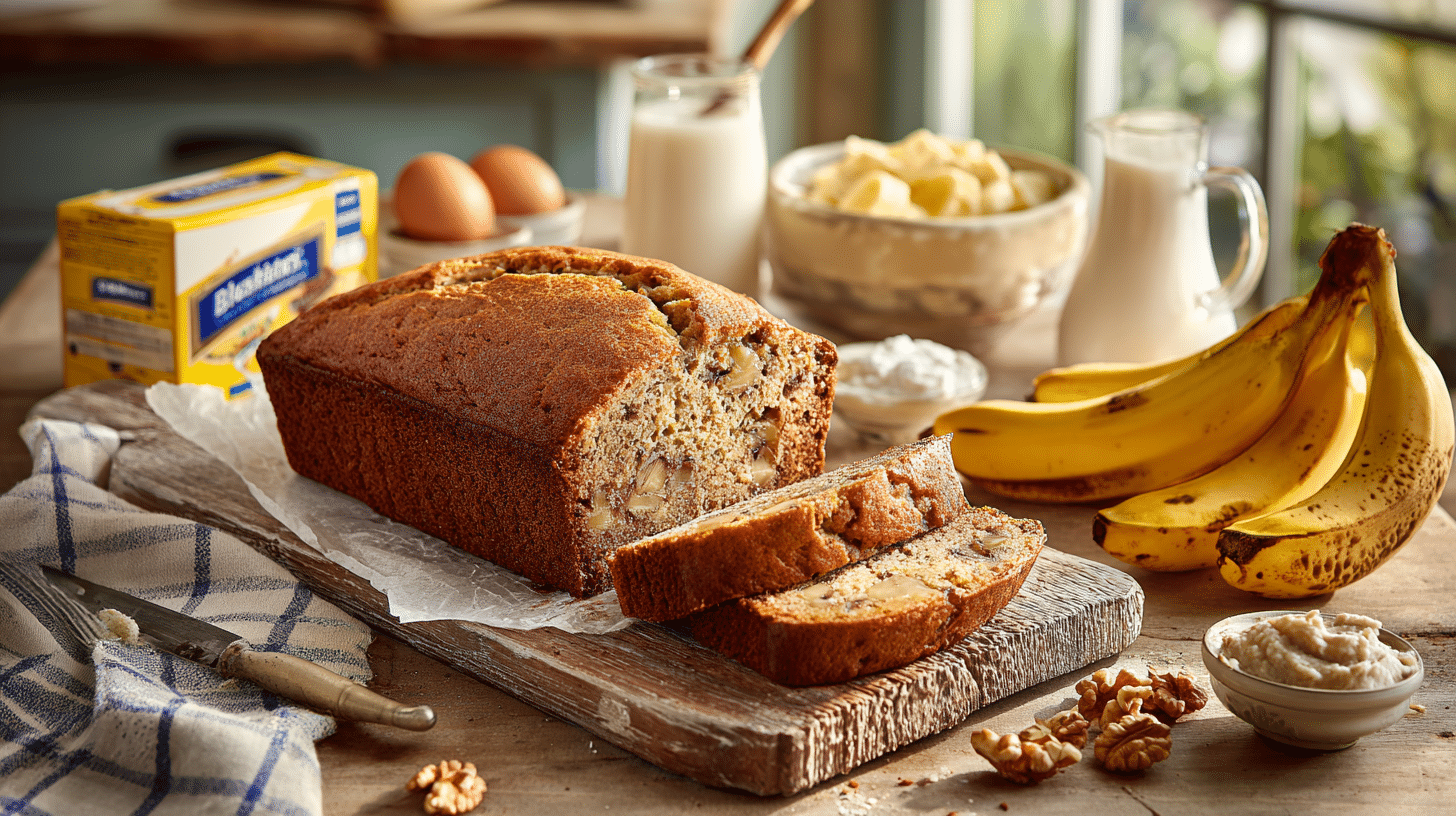
Alright, let’s talk about the stars of this show! The beauty of this bisquick banana bread recipe lies in its simplicity – you probably already have most of these ingredients hanging out in your kitchen right now. Moreover, each ingredient plays a crucial role in creating that perfect moist and tender crumb we’re all after in our bisquick banana bread recipe.
Wet Ingredients
First up, we’ve got our wet ingredients, and trust me, getting these right makes all the difference in the world!
Bananas (3-4 very ripe ones): Now, here’s where many folks go wrong – you want those bananas to be seriously overripe. We’re talking brown spots, soft to the touch, and maybe even a little mushy. Furthermore, these spotted beauties are packed with natural sugars that’ll make your bread incredibly flavorful. Additionally, if your bananas aren’t quite ripe enough, don’t worry! You can speed up the process by placing them in a paper bag with an apple overnight.
Oil or melted butter (1/3 cup): This ingredient is your ticket to moist banana bread that stays fresh for days. While vegetable oil creates a more tender texture, melted butter adds richness and flavor. However, either choice works beautifully, so go with whatever you have on hand.
Milk (1/2 cup): Regular whole milk works perfectly, but here’s a pro tip – buttermilk adds a subtle tang that complements the sweetness beautifully. Meanwhile, even 2% milk will do the job if that’s what’s in your fridge.
Eggs (2 large): These binding agents help everything come together while adding richness. Furthermore, make sure they’re at room temperature for better mixing – just pop them in warm water for five minutes if you forgot to take them out earlier.
Vanilla extract (1 teaspoon): This little addition elevates the entire flavor profile. Additionally, pure vanilla extract is worth the extra cost, but imitation vanilla works in a pinch.
Dry Ingredients
Moving on to our dry ingredients – this is where Bisquick really shines!
Bisquick Original Pancake & Baking Mix (2 cups): This is the hero ingredient that makes this easy banana bread possible. Moreover, stick with the original formula rather than heart-smart or gluten-free versions for this particular recipe, as they behave differently.
Granulated sugar (2/3 cup): This amount provides just the right sweetness without overwhelming the banana flavor. However, you can reduce it slightly if your bananas are extremely ripe and sweet.
Ground cinnamon (1/2 teaspoon, optional): While optional, this warm spice adds depth and complements the bananas beautifully. Furthermore, it gives your kitchen that amazing bakery smell while baking!
Optional Add-ins
Here’s where you can get creative with your banana bread variations:
Nuts (1/2 cup chopped): Walnuts are classic, but pecans add a buttery richness. Additionally, toasting them lightly beforehand intensifies their flavor.
Chocolate chips (1/3 cup): Because, honestly, everything’s better with chocolate! Moreover, mini chips distribute more evenly throughout the batter.
Dried fruit (1/4 cup): Raisins, cranberries, or chopped dates add chewy texture and extra sweetness.
Required Equipment and Tools
Now, let’s make sure you’ve got everything you need to create this moist banana bread masterpiece. Fortunately, you don’t need any fancy equipment – just basic kitchen tools that most home bakers already own.
9×5-inch loaf pan: This standard size is crucial for proper baking time and texture. Additionally, if you only have an 8×4-inch pan, you’ll need to adjust the baking time accordingly. Furthermore, glass, metal, or ceramic pans all work well, though metal pans tend to brown the bottom more quickly.
Large mixing bowl: You’ll need enough room to fold ingredients together without making a mess. Moreover, a bowl with a wide opening makes mixing much easier.
Fork for mashing bananas: While you could use a potato masher, a regular fork gives you better control over the texture. Additionally, you want some small chunks remaining for texture, not a completely smooth puree.
Measuring cups and spoons: Accurate measurements are key to consistent results. Furthermore, use dry measuring cups for the Bisquick and liquid measuring cups for wet ingredients.
Rubber spatula: This tool is essential for gentle folding, which prevents tough, dense bread. Meanwhile, a wooden spoon works too, but rubber spatulas are more effective at scraping bowl sides.
Toothpick: Your trusty doneness tester! Additionally, a thin knife or cake tester works just as well.
Before we dive into the actual baking process, here’s a crucial tip: proper preparation of your loaf pan makes all the difference. Therefore, generously grease it with butter or cooking spray, then lightly dust with flour. Better yet, line it with parchment paper, leaving some overhang for easy removal later!
Part 3: Step-by-Step Instructions
How to Make Bisquick Banana Bread: Complete Guide
Ready to transform those overripe bananas into something absolutely magical? Well, buckle up because we’re about to walk through each step of this foolproof bisquick banana bread recipe. Moreover, I’ll share all the little tricks and techniques that separate good banana bread from absolutely incredible bisquick banana bread recipe results!
Step 1: Prepare Your Kitchen
First things first – let’s get your kitchen ready for baking success! Start by preheating your oven to 350°F (175°C). Furthermore, this temperature is crucial because it’s hot enough to create a beautiful golden crust while allowing the center to bake through completely.
Next up, prepare that 9×5-inch loaf pan like a pro. Additionally, here’s my favorite method: generously butter the entire interior, then sprinkle a light coating of flour, tapping out any excess. However, if you want foolproof removal, line the pan with parchment paper, leaving some overhang on the long sides – this creates handles that make lifting out your finished loaf a breeze!
Meanwhile, gather all your ingredients on the counter. This step, called “mise en place” by professional bakers, prevents any last-minute scrambling and ensures you don’t forget anything important.
Step 2: Prepare the Bananas
Now comes the fun part – dealing with those perfectly ripe bananas! You want bananas that are well beyond what you’d eat fresh. In fact, the more brown spots, the better – those spots indicate converted starches that’ll make your bread naturally sweet and incredibly flavorful.
Here’s the technique for perfect banana mashing: place your bananas in a large mixing bowl and use a fork to mash them. Moreover, don’t aim for baby food smoothness – you want mostly mashed bananas with some small chunks remaining. These little pieces create delightful pockets of intense banana flavor throughout your moist banana bread.
Additionally, if your bananas are a bit too firm, don’t panic! You can microwave them for 30-60 seconds to soften them up. Furthermore, frozen bananas (thawed completely) actually work beautifully in this recipe and often produce even more intense flavor.
Step 3: Mix Wet Ingredients
Once your bananas are perfectly mashed, it’s time to create the wet ingredient mixture. Add your oil (or melted butter), milk, eggs, and vanilla extract directly to the bowl with the mashed bananas. Meanwhile, make sure that melted butter has cooled slightly – you don’t want to accidentally cook those eggs!
Here’s where technique really matters: whisk everything together until well combined, but don’t go crazy with the mixing. Furthermore, you want a smooth, unified mixture, but overmixing at this stage can lead to tough bread later on. Additionally, if you notice any streaks of egg white, give it just a few more gentle stirs.
Pro tip: room temperature ingredients blend together much more easily than cold ones. Therefore, if you forgot to take your eggs out of the fridge, just place them in a bowl of warm water for about five minutes before cracking them.
Step 4: Incorporate Dry Ingredients
Now we’re getting to the most critical step in this entire bisquick banana bread recipe – combining the dry ingredients. First, add the Bisquick mix, sugar, and cinnamon (if using) to your wet ingredient mixture.
Here’s the golden rule of banana bread success: fold, don’t beat! Using your rubber spatula, gently fold the dry ingredients into the wet mixture until just barely combined. Moreover, you should still see streaks of flour – this is exactly what you want! Additionally, the mixture will look lumpy and rough, and that’s perfectly normal.
Furthermore, this is the moment to add any optional ingredients like nuts or chocolate chips. Gently fold them in with just a few more strokes. Meanwhile, remember that every extra stir develops more gluten, which can make your bread tough and dense.
The key principle here is that quick breads like banana bread should be mixed minimally. In fact, professional bakers often say you should stop mixing while you think it needs just a few more stirs – that’s usually the perfect point!
Step 5: Baking Process
Time to transform your batter into beautiful, golden banana bread! Pour the batter into your prepared loaf pan, and don’t worry if it looks a bit rough on top – that rustic appearance is part of its charm. Additionally, give the pan a gentle tap on the counter to settle the batter and release any air bubbles.
Slide your pan into the preheated oven on the center rack. Furthermore, resist the urge to open the oven door for at least the first 45 minutes – sudden temperature changes can cause your bread to sink in the middle.
The baking time typically ranges from 50-60 minutes, but here’s how to know when it’s truly done: the top should be golden brown and spring back lightly when touched. Moreover, the bread will start pulling slightly away from the sides of the pan. Additionally, a toothpick inserted into the center should come out with just a few moist crumbs clinging to it – completely clean means it might be overbaked.
Here’s a professional trick: if the top is browning too quickly but the center isn’t done, loosely tent the loaf with aluminum foil for the remaining baking time. This prevents over-browning while allowing the interior to finish cooking.
Once done, let the bread cool in the pan for about 10 minutes before turning it out onto a wire rack. Furthermore, this brief cooling period prevents the bread from falling apart while still warm and fragile. Therefore, patience at this stage pays off with perfect slices later!
Part 4: Tips, Tricks, and Troubleshooting
Professional Tips for Perfect Results Every Time
Alright, let’s dive into the secrets that’ll transform you from a casual baker into a banana bread master! Moreover, these professional tips come from years of trial and error, so you don’t have to learn the hard way. Additionally, once you master these techniques, you’ll be creating consistently perfect banana bread that rivals any bakery.
Banana Selection and Preparation
Here’s the thing about bananas – timing really is everything! The best bananas for this bisquick banana bread recipe are those that look like they’re past their prime for eating. Furthermore, you want bananas with brown spots covering at least 50% of the peel, and they should yield easily to gentle pressure.
But what if your bananas aren’t quite ready? Well, here’s a game-changing trick for your bisquick banana bread recipe: place them in a brown paper bag with a ripe apple or pear overnight. Additionally, the ethylene gas from the other fruit speeds up the ripening process naturally. Meanwhile, if you’re really in a hurry, you can bake whole unpeeled bananas at 300°F for 15-20 minutes until the skins turn black – they’ll be perfectly sweet and soft inside!
Furthermore, here’s a pro tip that many bakers overlook: measure your mashed bananas rather than counting whole bananas. You’ll need about 1 to 1¼ cups of mashed banana for optimal bisquick banana bread recipe results. Moreover, if you’ve got extra overripe bananas, freeze them whole in their peels – they’ll keep for months and work beautifully in this recipe when thawed.
Mixing and Baking Secrets
Temperature control is absolutely crucial for moist banana bread success. Therefore, always bring your refrigerated ingredients to room temperature before mixing – this ensures even distribution and prevents lumpy batter. Additionally, room temperature ingredients blend more easily, which means less mixing and more tender results.
Here’s another insider secret: the “muffin method” of mixing is your best friend. This means combining all wet ingredients in one bowl and all dry ingredients in another, then gently folding them together until just combined. Furthermore, you should still see streaks of flour when you stop mixing – trust me on this one!
Moreover, don’t underestimate the power of proper oven positioning. Place your loaf pan on the center rack for even heat circulation. Additionally, avoid opening the oven door during the first 45 minutes of baking, as temperature fluctuations can cause your bread to collapse or bake unevenly.
Common Problems and Solutions
Let’s tackle the most frequent banana bread troubleshooting issues that home bakers face. After all, knowing how to fix problems before they happen is half the battle!
Troubleshooting Dense Bread
Nothing’s more disappointing than dense, heavy banana bread when you’re expecting light and moist results. However, this problem usually stems from one of three culprits, and they’re all easily preventable.
Overmixing is the number one culprit. When you beat the batter too vigorously or for too long, you develop the gluten in the Bisquick, resulting in tough, chewy bread. Furthermore, once you add the dry ingredients, switch to gentle folding motions and stop as soon as you can’t see dry flour streaks.
Incorrect measurements can also cause density issues. Additionally, too much Bisquick or not enough liquid creates a dry, heavy texture. Therefore, always level your measuring cups and use the proper liquid measuring cups for wet ingredients. Moreover, when in doubt, err on the side of slightly less flour rather than more.
Old or inactive leavening agents can also be the problem, though this is less common with Bisquick since it’s a commercial mix. However, if your Bisquick has been sitting in the pantry for over a year, it might be time for a fresh box. Meanwhile, storing your baking mix in an airtight container helps maintain its effectiveness.
 Whip up a batch of this delightful banana bread with the convenience of Bisquick mix. The warm aroma of baked goods wafting through the kitchen will have everyone gathered around for a slice. Perfect for breakfast or a cozy afternoon treat, this Bisquick banana bread recipe is a surefire hit for all occasions. Let the simple magic of baking bring joy to your home with this easy-to-follow recipe.
Fixing Dry or Crumbly Texture
Dry banana bread is often the result of overbaking or ingredient imbalances. Furthermore, here’s how to prevent this common issue and ensure your bread stays incredibly moist for days.
Proper moisture balance starts with using adequately ripe bananas – they should contribute significant moisture to your batter. Additionally, don’t skimp on the oil or butter, as these fats keep the crumb tender and moist. Meanwhile, if you’re trying to make a healthier version, applesauce can replace up to half the oil without sacrificing too much moisture.
Baking time and temperature precision makes all the difference. Moreover, every oven runs slightly differently, so invest in an oven thermometer to ensure accuracy. Furthermore, start checking for doneness at 50 minutes, and remember that a few moist crumbs on your toothpick are perfect – completely clean means it’s likely overbaked.
Storage techniques can save even slightly dry bread. Additionally, wrap your cooled loaf tightly in plastic wrap or store it in an airtight container with a slice of fresh bread – the moisture will redistribute overnight. Furthermore, proper storage not only maintains moisture but also allows flavors to meld and improve over time.
Here’s a final pro tip: if your bread turns out drier than expected, don’t despair! Moreover, you can brush the top with a simple syrup made from equal parts sugar and water, or even transform it into delicious banana bread french toast the next morning.
Recipe Variations and Related Ideas
If you love this Bisquick banana bread recipe, you’ll definitely want to explore some exciting variations! For those who enjoy tropical flavors, try our Hawaiian banana bread recipe that incorporates coconut and pineapple for an island twist. Additionally, if you’re looking for different ways to use cake mixes in baking, our banana bread recipe using cake mix offers another convenient shortcut method.
Furthermore, for those who prefer the classic approach with nuts, our classic banana nut bread recipe provides traditional flavors that never go out of style. Meanwhile, if you only have a couple of bananas on hand, don’t miss our two banana banana bread recipe that’s perfect for smaller batches.
For cookie lovers who want banana bread flavors in a different format, try our delightful banana bread cookies recipe that transforms all those beloved flavors into portable treats. Additionally, if you’re interested in other quick breakfast options, our rhubarb muffins recipe offers another fantastic way to use seasonal fruits in baked goods.
Quick Conclusion
This guide provides essential tips for creating exceptional bisquick banana bread, ensuring bakery-quality results by selecting ripe bananas and using proper folding techniques. Emphasizing that baking combines both art and science, it encourages personalization with unique add-ins, making it easy to utilize overripe bananas and reduce waste.