🔹 Part 2: Ingredients & Tools You’ll Need
Essential Ingredients for Martha Stewart Banana Bread Recipe
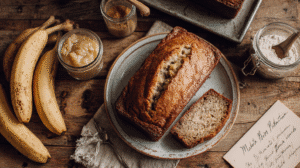
When it comes to making banana bread that’s both moist and rich in flavor, the ingredients matter—especially when you’re following a time-tested recipe like Martha Stewart banana bread recipe . The beauty of this loaf lies in its simplicity; it doesn’t need a dozen exotic items to taste incredible. Instead, it relies on everyday pantry staples that come together beautifully.
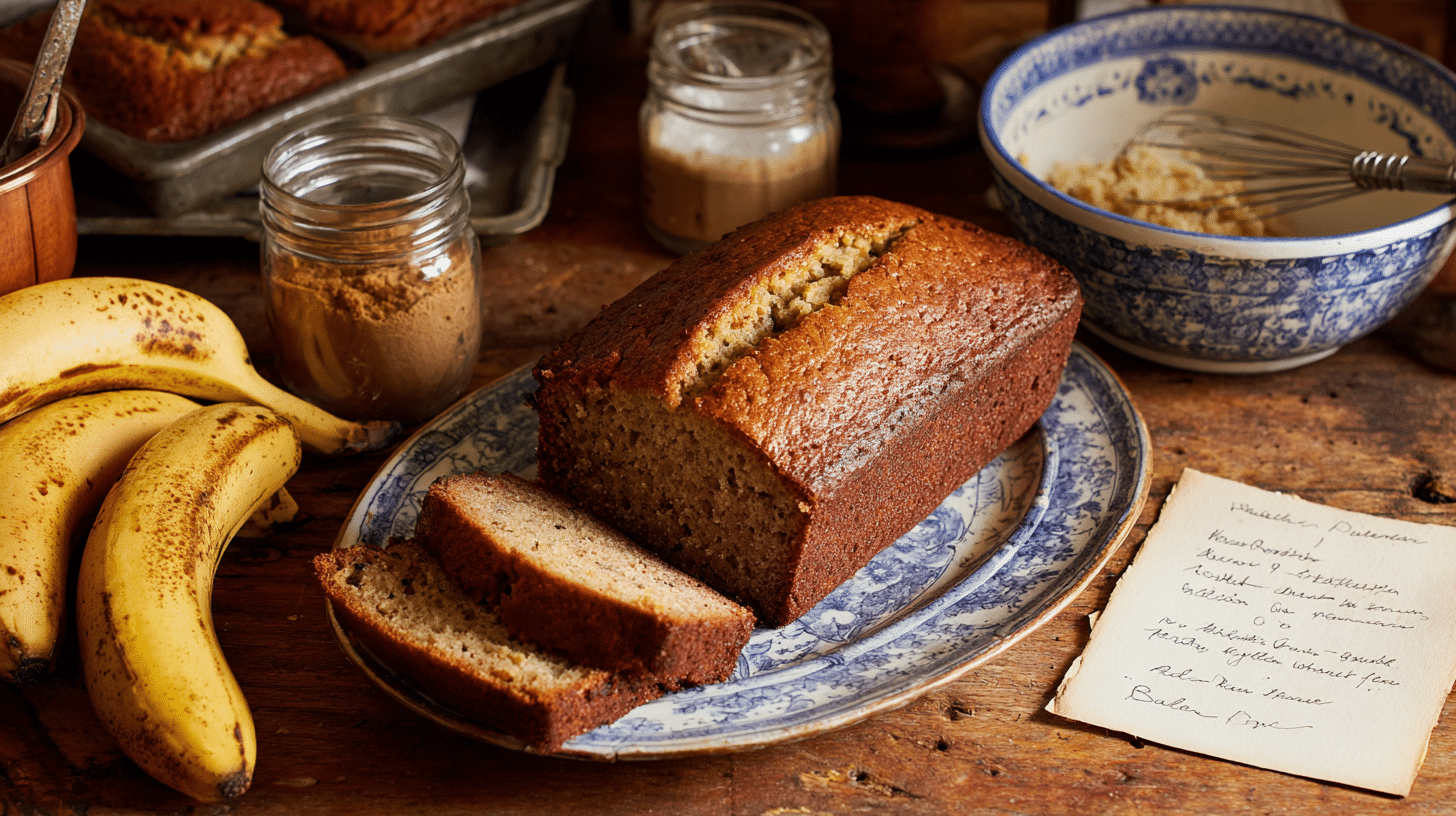
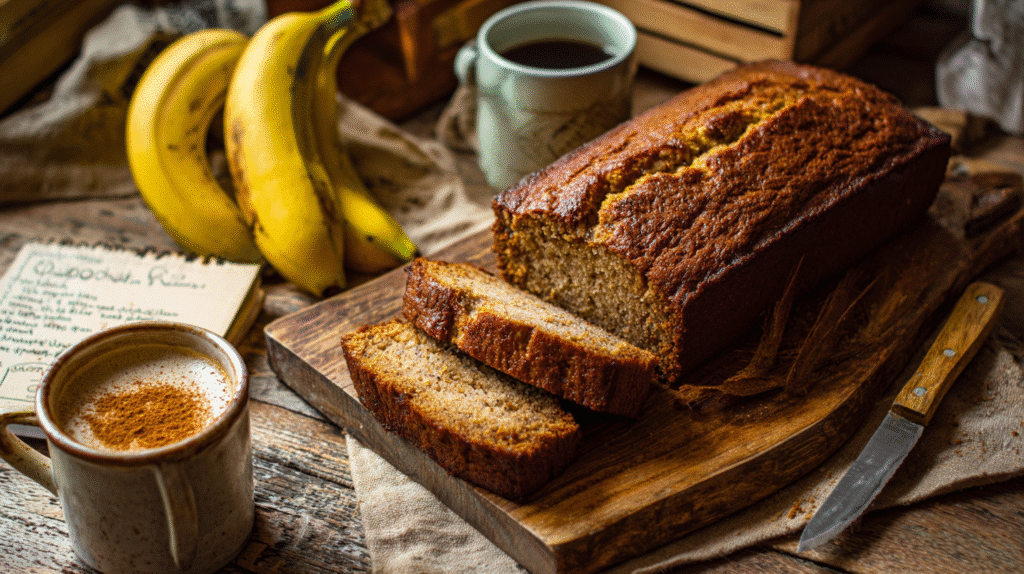
Let’s start with the star of the show—overripe bananas . These are key because they bring natural sweetness and moisture to the batter. You’ll typically want about three medium-sized bananas, mashed until smooth but still a bit chunky for texture.
Next up is the flour. All-purpose flour works best unless you’re going gluten-free, in which case a one-to-one gluten-free blend should do just fine. Then there’s baking soda, which gives the bread its rise and airy structure. Don’t skip it unless you’re okay with a dense loaf!
You’ll also need some fat—butter or oil, depending on your preference. Martha’s version usually calls for melted butter, which adds a richer depth of flavor compared to oil. But hey, if you’re keeping it vegan, feel free to swap it out for coconut oil or another plant-based alternative.
Brown sugar is another essential ingredient in this moist banana bread —it not only sweetens the deal but also helps keep the crumb tender and soft. Pair that with a dash of salt to balance everything out, and you’ve got yourself a solid base.
Oh, and don’t forget the eggs—they bind everything together and add to that irresistible texture we all love in banana bread.
Optional Add-ins and Variations
Now, here’s where things get fun—because let’s be honest, plain banana bread is great, but sometimes you want a little extra flair. That’s where optional add-ins come into play.
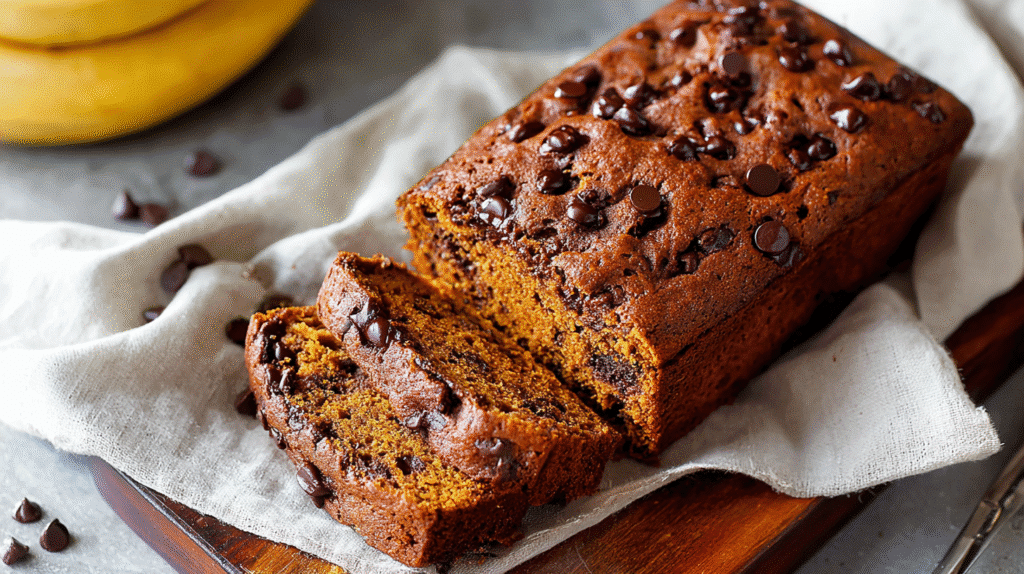
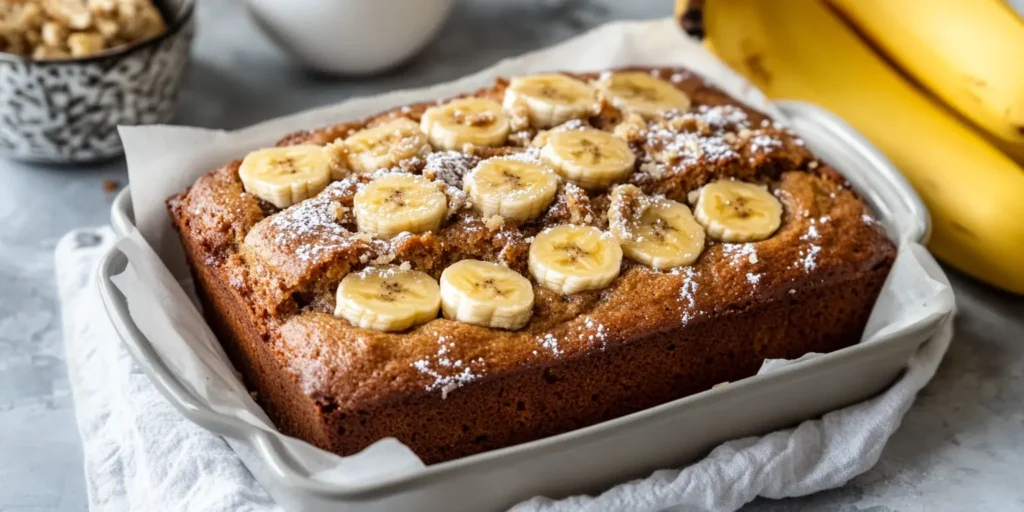
One classic choice? Banana bread with walnuts . A handful of chopped walnuts folded into the batter adds crunch and a nutty richness that pairs perfectly with the sweetness of the bananas. If nuts aren’t your thing, chocolate chips are always a crowd-pleaser. Semi-sweet, dark, or even white chocolate chunks can take your loaf from basic to bakery-style in no time.
Want something a bit more grown-up (but still totally family-friendly)? Try sprinkling cinnamon or nutmeg into the batter. It brings warmth and complexity without overpowering the banana flavor.
And if you’re feeling adventurous, why not top your loaf with a streusel topping before baking? A simple mix of flour, brown sugar, and cold butter creates a crunchy, caramelized crust that makes every slice feel like a special treat.
These variations are perfect for customizing the recipe to suit dietary preferences or just your mood. Whether you go for banana bread with chocolate chips , banana nut bread , or keep it simple and classic, the options are endless—and delicious.
Kitchen Tools Required for Baking
Before you dive headfirst into mixing, make sure you’ve got the right tools on hand. After all, even the best banana bread recipe no mixer needed requires a few essentials to ensure success.
First things first—you’ll need a good set of mixing bowls. One for the wet ingredients and one for the dry. A sturdy whisk or spatula will help you blend everything smoothly without overworking the batter, which is key to avoiding a tough final product.
A loaf pan is non-negotiable. Standard sizes are usually 8×4 inches or 9×5 inches, so check your recipe accordingly. Be sure to grease it well or line it with parchment paper to prevent sticking.
An oven thermometer is also a smart addition to your toolkit, especially if you’re serious about baking. Ovens can be temperamental, and an inaccurate temperature might lead to undercooked or overly browned bread. For more tips on ensuring your oven runs true, you can refer to America’s Test Kitchen’s helpful guide on ensuring accurate oven temperature .
Finally, a cooling rack is ideal for letting your bread cool evenly after baking. Slicing too soon can trap steam inside, leading to a gummy texture—so patience really does pay off.
With your ingredients prepped and your tools ready, you’re all set to move on to the fun part: mixing and baking your very own Martha Stewart banana bread recipe .
🔹 Part 3: Step-by-Step Instructions
Preparing the Batter: A Detailed Walkthrough
Okay, now that you’ve got your ingredients measured and your tools lined up, it’s time to get mixing. Let’s walk through the process step by step, because while this banana bread recipe no mixer needed sounds easy (and honestly, it is), there are a few small details that make all the difference.
Start by preheating your oven to 350°F (175°C). While that’s warming up, grab your ripe bananas and mash them thoroughly in a large bowl. Some people like using a fork, others swear by a potato masher—either works fine, as long as you end up with mostly smooth banana mush, maybe with a few small lumps for texture.
Once your bananas are mashed, stir in the melted butter or oil. Then add in the brown sugar and give it a good mix until everything looks combined. Crack in your eggs one at a time, stirring well after each addition so the mixture emulsifies properly.
Now it’s time for the dry ingredients. In a separate bowl, whisk together the flour, baking soda, and salt. Slowly pour the dry mixture into the wet, folding gently with a spatula until just incorporated. Resist the urge to overmix—it may look a little lumpy, but that’s exactly what you want. Overmixing leads to gluten development, which means a tougher, denser loaf. And nobody wants that kind of surprise.
If you’re adding any extras like chocolate chips or nuts, now’s the time to fold those in gently. Once everything is mixed, pour the batter into your prepared loaf pan and smooth the top with your spatula.
Pro tip: If you’re making muffins instead of a loaf, simply divide the batter evenly among greased or lined muffin cups and adjust the baking time accordingly.
Baking Time and Temperature Guidelines
Time to pop your batter into the oven. Set your timer for around 50–60 minutes, depending on your oven and the size of your loaf pan. If you used a smaller pan or made muffins, the time will be shorter—start checking around the 30-minute mark.
The best way to test if your moist banana bread is done is by inserting a toothpick or cake tester into the center of the loaf. If it comes out clean or with just a few moist crumbs clinging to it, you’re good to go. If there’s still wet batter, keep baking and check again in 5-minute intervals.
Avoid opening the oven door too early—doing so can cause the bread to sink in the middle. Patience pays off here.
Also, remember that carryover baking happens. Even once you pull the loaf from the oven, residual heat continues to cook it slightly, so don’t panic if it seems just barely done. That’s actually perfect for achieving that ideal texture.
Cooling and Slicing Tips
Now comes the hardest part: waiting. As tempting as it is to dig in right away, giving your banana bread time to cool is crucial. Let it rest in the pan for about 10–15 minutes, then carefully transfer it to a wire rack to cool completely. Trying to slice it too soon can result in a messy, crumbly mess—trust me, it’s worth the wait.
Once cooled, use a sharp serrated knife to cut clean, even slices. If you’re storing leftovers, wrap the bread tightly in plastic wrap or place it in an airtight container. Want to keep it longer? Wrap it well and freeze it for up to three months. Just thaw at room temperature or warm a slice in the toaster for a fresh-out-of-the-oven feel.
And there you have it—your homemade Martha Stewart banana bread recipe , baked to perfection.
🔹 Part 4: Expert Tips from Martha Stewart’s Method
Secrets to Moist and Flavorful Banana Bread with Overripe Bananas
Let’s be real—no one wants dry, bland banana bread. If you’ve ever ended up with a loaf that tasted more like a doorstop than a dessert, don’t worry—you’re not alone. The good news is that with just a few tweaks and some smart baking know-how, you can make sure every slice of Martha Stewart banana bread recipe comes out perfectly moist and bursting with flavor.
One of the biggest secrets? Using overripe bananas . Not just ripe—really ripe. You know, the kind with black spots and peels that look like they’ve seen better days. That extra ripeness means more natural sugars and deeper banana flavor, which translates into a richer tasting bread. So next time you’re tempted to toss those overly browned bananas, think again—they might just be your best bet for moist banana bread .
Another game-changer is the use of brown sugar . Unlike white sugar, brown sugar contains molasses, which adds both sweetness and moisture. It also helps create that soft, tender crumb we all love in banana bread. Don’t skip it unless you’re okay with sacrificing texture and depth of flavor.
And here’s something you might not have considered—don’t overbake . This one trips up even experienced bakers. Pull the loaf out of the oven just before you think it’s fully done because the residual heat will finish cooking it. Remember, nobody likes a dry slice of bread, especially when it was supposed to be soft and comforting.
Finally, resist the urge to stir the batter too much. Overmixing develops gluten, which leads to a denser, tougher loaf. Just mix until everything is combined, and call it good. A few lumps in the batter? Totally fine. In fact, it’s better than perfect smoothness.
Common Mistakes to Avoid
Even the most seasoned bakers can slip up when making banana bread. Let’s talk about some of the most common blunders—and how to avoid them so your banana bread recipe no mixer needed still turns out amazing.
First off, using underripe bananas. Sure, they look nice and yellow, but if they’re not soft and sweet enough, your bread won’t have that signature banana flavor. Stick with bananas that are just past eating stage —trust us, your taste buds will thank you.
Another frequent mistake? Measuring flour incorrectly. Scooping directly from the bag packs the flour down, giving you more than you actually need. Instead, fluff the flour first, then spoon it into your measuring cup and level it off. Or better yet, use a kitchen scale for accuracy.
Also, don’t forget to grease your pan properly. Nothing ruins a good day like banana bread that sticks to the bottom of the pan. Use non-stick spray or butter and flour to ensure a clean release.
Lastly, opening the oven too early. We get it—it’s hard to resist checking on your masterpiece. But opening the oven door too soon can cause the bread to collapse or bake unevenly. Be patient. Set a timer and let the bread do its thing undisturbed.
Presentation Ideas and Serving Suggestions
So your Martha Stewart banana bread recipe is baked, cooled, and ready to go. Now what? Time to serve it up like a pro!
For a simple but elegant touch, dust the top with powdered sugar right before slicing. It adds a little visual flair without changing the flavor. If you want to go the extra mile, whip up a quick cinnamon glaze or drizzle some melted chocolate over the top for a bakery-style finish.
Serve warm with a pat of butter or cream cheese spread for a rich, indulgent treat. Pair it with a hot cup of coffee or tea, and you’ve got yourself the ultimate comfort combo.
Want to take it to the next level? Try toasting a slice and topping it with peanut butter or honey. It’s like upgrading your snack from “good” to “unbelievable.”
And if you’re gifting the loaf or bringing it to a gathering, wrap it in parchment paper and tie it with a ribbon. Instant homemade charm!
🔹 Part 5: Comparisons and Variations
How Martha Stewart Banana Bread Recipe Compares to Others
There’s no shortage of banana bread recipes floating around the internet, from viral TikTok versions to grandma’s handwritten notes. But how does Martha Stewart banana bread recipe stack up against the competition?
Well, for starters, Martha’s version leans on simplicity and precision. She uses classic ingredients without unnecessary extras, focusing instead on technique and balance. Compared to other popular recipes—like Ina Garten’s version with sour cream or Food Network’s oil-based loaves—Martha’s method feels more approachable and forgiving for everyday bakers.
Many modern banana bread recipes call for oil instead of butter, claiming it makes the bread moister. While that may be true, butter brings a richness and depth of flavor that oil simply can’t match. Martha knows this, which is why her version goes the traditional route.
Also, unlike some recipes that throw in a dozen optional add-ins, Martha keeps it clean and focused. Her bread is about the banana flavor first, with just enough spice and sweetness to enhance—not overpower—the base.
If you’re looking for something fuss-free, reliable, and deeply satisfying, Martha Stewart banana bread recipe is a solid choice that holds its own against the crowd.
Gluten-Free and Vegan Adaptations
Now, what if you’re following a special diet? Can you still enjoy banana bread with overripe bananas without compromising your lifestyle choices?
Absolutely. With a few easy swaps, you can make a gluten-free or vegan version of this beloved loaf without losing any of the flavor or texture.
For a gluten-free adaptation, replace regular all-purpose flour with a one-to-one gluten-free blend. Look for one that includes xanthan gum for structure, or add a pinch if it doesn’t already contain it. Also, double-check that your baking powder and other ingredients are certified gluten-free to avoid cross-contamination.
Going vegan ? Swap the eggs with mashed banana, applesauce, or flax eggs (1 tablespoon ground flaxseed + 3 tablespoons water per egg). Replace the butter with coconut oil or vegan margarine, and use plant-based milk if needed. Brown sugar is naturally vegan, so no worries there.
The result? A delicious, allergy-friendly version of moist banana bread that everyone can enjoy—no matter their dietary needs.
Martha Stewart Banana Bread Muffin Version
Craving individual portions or looking for a great breakfast-on-the-go option? Then consider turning your banana bread recipe no mixer needed into muffins.
The process is nearly identical—just divide the batter evenly among greased or lined muffin cups and adjust the baking time. Typically, muffins take about 20–25 minutes at the same 350°F (175°C) temperature.
They’re perfect for meal prep, school lunches, or freezing for later. Plus, they bake faster and give you that coveted domed top everyone loves.
Want to dress them up even more? Top each muffin with a sprinkle of coarse sugar before baking for a crunchy crust, or press a mini chocolate chip into the center for a surprise burst of flavor.
Muffins also offer more flexibility for customization. Make half plain, half with nuts, and half with chocolate chips—everyone gets what they love, and cleanup is a breeze.
🔹 Part 6: Frequently Asked Questions (FAQs)
This section answers the burning questions people often ask when making Martha Stewart banana bread recipe . Think of it as your troubleshooting cheat sheet.
What kind of bananas should I use for banana bread?
Ripe bananas with brown spots are ideal. They’re sweeter and easier to mash, giving your bread that classic banana flavor.
Can I use frozen bananas for this recipe?
Yes! Thaw them completely and drain any excess liquid before mashing. Frozen bananas tend to be softer, so they work well in banana bread.
How do I know when the banana bread is done baking?
Insert a toothpick into the center. If it comes out clean or with just a few crumbs, it’s ready.
Is Martha Stewart’s banana bread recipe gluten-free?
Not by default, but it’s easy to adapt using gluten-free flour blends.
Can I substitute oil for butter in this recipe?
You sure can. Use an equal amount of oil, but keep in mind that butter offers a richer flavor.
Why did my banana bread turn out dry?
Overbaking or using too much flour are the usual culprits. Also, underripe bananas can lead to a drier outcome.
How long does banana bread last at room temperature?
Up to 3–4 days in an airtight container. Wrap tightly to retain moisture.
Can I add chocolate chips or nuts to this recipe?
Absolutely! Fold them in at the end before pouring the batter into the pan.
Short Conclusion
Whether you’re baking for comfort, convenience, or a crowd-pleasing treat, Martha Stewart banana bread recipe delivers every time. From selecting the perfect bananas to mastering the art of moistness and flavor, this guide has given you all the tools you need to succeed in the kitchen.
With expert tips, variations for different diets, and answers to frequently asked questions, you’re now fully equipped to bake like a pro—even if you’re just starting out.
So go ahead, grab those bananas, and make something truly special. After all, the smell of fresh banana bread cooling on the counter is one of life’s simplest—but most satisfying—joys.