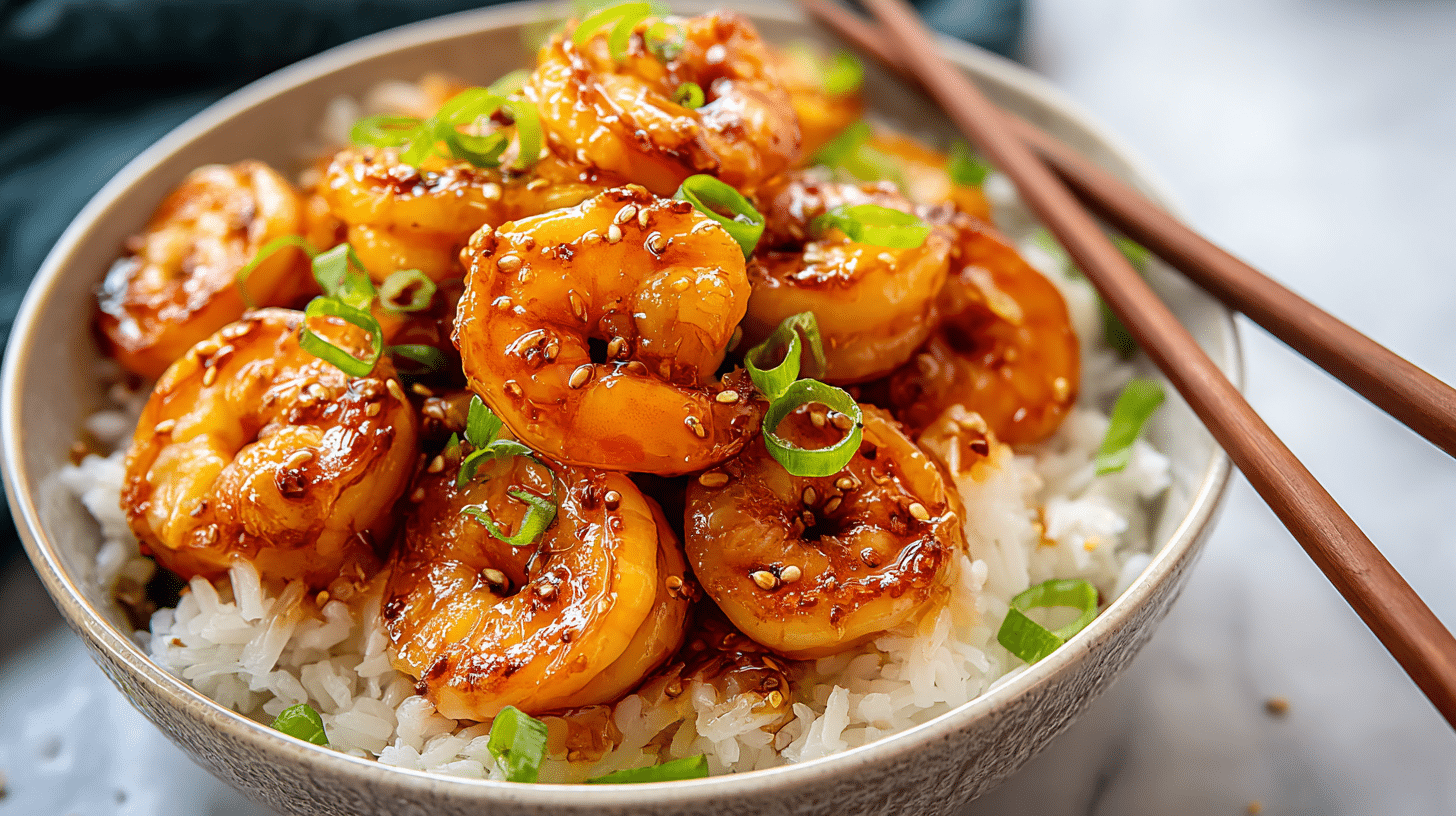
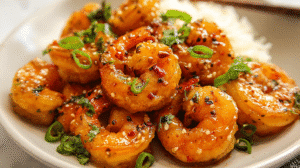
10 Minute Honey Garlic Shrimp
Introduction
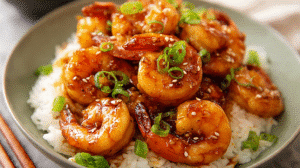
You know those evenings when you open the fridge, sigh, and think, “What on earth am I going to cook?” Well, that’s exactly when 10 Minute Honey Garlic Shrimp swoops in to save the day. Bursting with flavor from a glossy honey–soy glaze and rich garlic kick, this quick skillet recipe transforms a handful of simple ingredients into a restaurant-worthy dinner — all in less time than it takes to scroll through your feed.
Here’s the real beauty: the shrimp cook in just a few minutes per side, so the whole dish — from chopping garlic to plating — comes together in ten. Yep, ten flat. And since shrimp are naturally low in calories yet packed with protein, this isn’t just about speed; it’s about smart, wholesome eating too.
Stick around, because we’re about to walk through every detail: the short and flexible ingredient list, essential equipment, foolproof steps to nail that caramelized glaze, and clever tips for making sure your shrimp stay tender, never rubbery. Plus, I’ll share gluten-free swaps, spicy variations, and meal prep tricks so you can enjoy this dish exactly the way you like it.
Part 2 — Ingredients, Equipment & Method
Ingredients
For a recipe that tastes like it took all day but really takes just ten minutes, the ingredient list is wonderfully short and flexible. Here’s what you’ll need:
-
1 lb raw shrimp — peeled, deveined, tails on or off (your choice). Medium to large shrimp (16–20 or 26–30 count) work best.
-
3–4 cloves garlic, finely minced (or 1 tsp garlic paste if you’re in a hurry).
-
3 Tbsp honey — the sticky star of the glaze.
-
2 Tbsp low-sodium soy sauce — or tamari for a gluten-free version.
-
1 tsp grated ginger (optional but adds depth).
-
1 Tbsp cornstarch (or arrowroot for paleo/gluten-free) mixed with 2 Tbsp cold water — this slurry thickens the sauce.
-
1–2 Tbsp neutral oil (like avocado or canola) for searing.
-
Pinch of salt and pepper.
-
Red pepper flakes or chili paste (optional for heat).
-
Garnishes: sliced green onions, sesame seeds, fresh lemon or lime wedges.
Ingredient Notes & Substitutions
-
Gluten-free? Swap soy sauce for tamari or coconut aminos.
-
No honey? Try maple syrup for a vegan twist.
-
Want it spicier? Add sriracha or chili flakes.
-
Meal prep hack: Cook extra shrimp and keep the sauce separate to reheat later.
Equipment
You don’t need a gourmet kitchen to pull this off, but the right tools make all the difference:
-
A large non-stick skillet or well-seasoned cast-iron pan for even browning.
-
Mixing bowls for tossing shrimp and whisking the glaze.
-
A whisk or fork for blending the cornstarch slurry.
-
Tongs or spatula for flipping quickly.
-
Optional but smart: a food thermometer to check doneness (shrimp should hit 145 °F).
Why a hot pan matters
Shrimp cook lightning-fast. A properly heated skillet guarantees a golden sear instead of a sad, steamed pile of seafood.
Prep Steps
Thawing & Drying Shrimp
If you’re starting with frozen shrimp, thaw them quickly in a bowl of cold water (about 10–15 minutes). Always pat them bone-dry with paper towels — moisture is the enemy of a good sear.
Marinade vs Quick Toss
Unlike chicken or beef, shrimp don’t need a long soak. In fact, too much time in acidic marinades turns them mushy. A simple toss with soy sauce and cornstarch just before cooking works like magic, giving you that velvety finish without the wait.
Make the Sauce
In a small bowl, whisk together honey, soy sauce (or tamari), minced garlic, ginger, and the cornstarch slurry. Set aside — you’ll need it ready since things move fast once the shrimp hit the pan.
Cooking Method — Step by Step
-
Heat the pan: Add oil and crank it to medium-high. The pan should be hot but not smoking.
-
Bloom the aromatics: Toss in garlic and ginger for 20–30 seconds. Stir quickly — burnt garlic ruins everything.
-
Sear the shrimp: Lay shrimp in a single layer. Cook for 1–2 minutes per side until they turn opaque pink with golden edges. Flip once.
-
Remove briefly: Take shrimp out to avoid overcooking.
-
Make the glaze: Pour in your honey–soy mix. Stir as it bubbles for about 1 minute until glossy and slightly thick.
-
Return shrimp: Slide the shrimp back into the pan, tossing to coat them in that sticky, shiny sauce. Finish with a knob of butter if you want extra richness.
-
Garnish & serve: Sprinkle sesame seeds, green onions, and a squeeze of lemon or lime. Serve immediately.
Cook’s Notes
-
Shrimp continue cooking after you pull them off the heat — so don’t wait for them to look completely done in the pan.
-
If the sauce thickens too much, splash in a tablespoon of water or broth.
-
Watch the honey: high heat can burn it quickly, so reduce the flame once the sauce is in.
Sauce Tips & Thickening
A slurry is your friend here: whisk 1 Tbsp cornstarch with 2 Tbsp cold liquid before adding it. This avoids clumps and makes the glaze shiny, not gloopy. If you’d rather skip starch altogether, just let the sauce reduce naturally — it’ll still coat beautifully.
Part 3 — Tips, Serving and Recipe Variations
Troubleshooting & Pro Tips
Shrimp might be small, but they can be a little diva in the pan. To make sure your honey garlic shrimp turns out perfect every single time, here are the top tricks seasoned cooks swear by:
Top 10 Tips
-
Don’t overcrowd the pan — too many shrimp at once will steam, not sear.
-
Pat them dry — excess water prevents caramelization and keeps them soggy.
-
Size matters — large shrimp need about 2 minutes per side; small ones, less.
-
Add sauce off high heat — honey scorches fast, so reduce the flame first.
-
Balance sweetness with acid — a squeeze of lemon or lime cuts the glaze’s richness.
-
Want heat? Sprinkle in chili flakes or stir in a dab of chili paste.
-
Arrowroot vs cornstarch — arrowroot gives a clear, glossy glaze and works great if you’re gluten-free.
-
Oops, overcooked? Toss shrimp quickly in extra sauce; it helps mask the chewiness.
-
Air fryer option — coat shrimp lightly with sauce, cook at 400 °F for 5–6 minutes, flipping halfway.
-
Meal prep hack — store shrimp and sauce separately, then combine just before reheating for the freshest taste.
What to Serve It With (Pairings & Plating)
Shrimp are quick, so your sides should be too. Here are pairings that turn 10 Minute Honey Garlic Shrimp into a full-blown dinner:
Best Sides
-
Steamed jasmine rice or nutty brown rice.
-
Garlic noodles or simple buttered pasta.
-
Cauliflower rice or zucchini noodles for low-carb nights.
-
Stir-fried vegetables like broccoli, bok choy, or snap peas.
-
A crisp green salad with a light vinaigrette.
Garnishes & Sauces
-
Sprinkle sesame seeds for crunch.
-
Add a fresh pop with chopped cilantro or parsley.
-
Drizzle with chili oil if you like fiery notes.
-
Always, always finish with lemon or lime wedges.
Presentation Tips
-
Serve in a shallow bowl with rice at the bottom and shrimp piled on top.
-
Drizzle extra glaze around the edges for that glossy “takeout vibe.”
-
Garnish generously — people eat with their eyes first.
Variations
Shrimp recipes are like a blank canvas — this one is easy to tweak depending on your mood, diet, or pantry.
-
Gluten-Free / Paleo: Swap soy sauce for tamari or coconut aminos. Use arrowroot instead of cornstarch. The flavor stays bold, the sauce stays glossy.
-
Keto / Low Carb: Cut the honey in half or use a keto-friendly sweetener. Serve over cauliflower rice instead of regular rice. Still sticky, still delicious, but lighter on carbs.
-
Spicy Honey Garlic: Love some heat? Stir in sriracha, chili paste, or extra flakes. The contrast between sweet honey and fiery spice is unbeatable.
-
Air Fryer or Oven:
-
Air fryer: 400 °F for 5–6 minutes, flip halfway through. Brush with glaze after cooking for shine.
-
Oven: Broil on high for 3–4 minutes per side, then toss with sauce.
-
Part 4 — Storage, Nutrition, FAQs & Yoast Checklist
Storage, Make-Ahead & Reheating
The beauty of 10 Minute Honey Garlic Shrimp is how fast it comes together, but it also stores surprisingly well if you’ve made too much.
-
In the fridge: Store in an airtight container for 3–4 days. Shrimp should always be chilled within two hours of cooking to avoid bacterial growth. According to shrimp food safety & safe cooking temps, seafood is safest when stored promptly and reheated properly.
-
In the freezer: Lay shrimp out on a tray to freeze individually, then transfer to a freezer bag. They’ll last about 2 months this way.
-
Reheating: Gently warm in a skillet over low heat with a splash of water or broth. Avoid microwaving too long — it toughens the shrimp.
Nutrition & Health Notes
Shrimp are little nutrition powerhouses. They’re low in calories, high in protein, and naturally rich in nutrients like selenium, iodine, and vitamin B12. The honey glaze does add some sugar, but balance it with veggies or whole grains, and you’ve got a smart weeknight dinner.
For those who are pregnant or watch their seafood intake, it’s wise to check seafood consumption & mercury guidance. Most shrimp are considered low in mercury, making them a safe and healthy choice.
Want numbers? According to shrimp nutrition facts (USDA), a 3-ounce serving has about 84 calories, 18 g of protein, and less than 1 g of fat. Not bad for something that cooks in five minutes flat!
FAQs
Q1 — How long should I cook shrimp for honey garlic shrimp?
Usually 1–2 minutes per side on medium-high heat. Shrimp turn pink and opaque when done — that’s your signal to flip or pull them off the pan.
Q2 — Can I use frozen shrimp?
Absolutely! Thaw them quickly in cold water, then pat dry before cooking. Starting wet leads to steaming instead of searing.
Q3 — How do I stop shrimp from becoming rubbery?
Two words: don’t overcook. Pull them as soon as they’re opaque, and let the residual heat finish the job.
Q4 — Is honey garlic shrimp healthy?
Yes — shrimp is lean protein with minimal fat. The honey glaze does add sugar, but balance it with vegetables or whole grains, and it’s a smart meal.
Q5 — Can I make this gluten-free?
Totally. Just use tamari or coconut aminos instead of soy sauce, and arrowroot in place of cornstarch. Same sticky glaze, no gluten.
Q6 — What should I serve with honey garlic shrimp?
Rice, noodles, or steamed vegetables all pair beautifully. For low-carb nights, cauliflower rice or zucchini noodles work wonders.
Part 5 — Extra Tips, Creative Pairings & Advanced Variations
Advanced Cooking Tips
Once you’ve mastered the basics of 10 Minute Honey Garlic Shrimp, you might crave a little upgrade. Here’s how to level up without adding fuss:
-
Control the heat zones: If using a large skillet, keep one side hotter for searing and the other cooler for finishing the glaze. This prevents honey from burning.
-
Butter trick: Adding a tablespoon of butter at the very end emulsifies the sauce, making it ultra silky.
-
Citrus boost: A splash of fresh orange or pineapple juice adds brightness and layers of flavor without overpowering the garlic.
-
Batch cooking: If doubling the recipe, cook shrimp in batches. Toss everything together with the sauce at the end so each piece stays golden instead of steamed.
-
Texture balance: Add roasted cashews, sesame seeds, or crushed peanuts for crunch that contrasts the glossy glaze.
Beyond Rice — Fun Pairings
We all know rice and shrimp are best friends, but don’t stop there. Shake things up with these fun and fast ideas:
-
Shrimp tacos: Spoon shrimp and sauce into warm tortillas, add shredded cabbage, and top with a drizzle of lime crema.
-
Asian noodle bowls: Toss shrimp over soba, udon, or even instant ramen — soak noodles in the leftover glaze for extra flavor.
-
Shrimp lettuce wraps: Low-carb, light, and crunchy. Just add cucumber strips and carrots.
-
Shrimp power bowls: Layer quinoa, roasted veggies, avocado slices, and honey garlic shrimp for a filling lunchbox hero.
-
Honey garlic shrimp skewers: Thread shrimp on skewers, brush with sauce, and broil or grill — perfect for gatherings.
Advanced Variations
Shrimp recipes adapt easily to global flavors. With the honey–garlic base, you’ve got a canvas to play with:
-
Thai-inspired: Add lime juice, fish sauce, and a hint of chili for sweet–savory heat.
-
Mediterranean-style: Replace soy with olive oil, sprinkle oregano, and finish with fresh parsley.
-
Teriyaki twist: Use mirin and extra soy sauce for a teriyaki glaze vibe.
-
Sesame shrimp: Stir in toasted sesame oil before serving for a nutty finish.
-
Vegetable-loaded: Toss in quick-cook veggies like bell peppers or snap peas to turn it into a one-pan stir-fry.
Part 6 — Serving Inspiration & Diet-Friendly Tips
Crowd-Pleasing Serving Ideas
Shrimp is versatile, so don’t limit yourself to the skillet-to-plate approach. Here are some creative serving inspirations:
-
Family-style platter: Serve honey garlic shrimp over a bed of steamed broccoli or bok choy with rice on the side. Perfect for weeknight dinners.
-
Shrimp bowls: Layer jasmine rice, shredded carrots, pickled cucumbers, and shrimp — it’s like a deconstructed sushi roll in a bowl.
-
Shrimp salad topper: Toss shrimp over fresh greens, cucumbers, and avocado with a light sesame vinaigrette for a satisfying lunch.
-
Shrimp party skewers: Serve on toothpicks with pineapple chunks for a fun appetizer at gatherings.
-
Quick lunch wraps: Roll in tortillas with spinach, slaw, and a smear of spicy mayo for a grab-and-go meal.
Diet-Friendly Variations
Whether you’re aiming for low-carb, gluten-free, or lighter meals, this recipe adapts easily:
-
Low-carb / Keto: Replace honey with a sugar-free substitute like monk fruit syrup. Serve shrimp over cauliflower rice or zucchini noodles.
-
Gluten-free: Use tamari or coconut aminos instead of soy sauce. Arrowroot powder works great in place of cornstarch.
-
Dairy-free: Skip butter at the end and stick to oil — the glaze will still shine.
-
Low-sodium: Use reduced-salt soy sauce, or dilute with water and add extra garlic and lemon for flavor.
-
Paleo-friendly: Stick to raw honey, coconut aminos, and natural oils for a clean, whole-food approach.
When to Serve 10 Minute Honey Garlic Shrimp
This dish fits almost any occasion:
-
Busy weeknights: Ready in under 15 minutes, perfect after long days.
-
Meal prep Sundays: Store in lunchboxes with brown rice and roasted veggies.
-
Date night dinners: Elegant enough for a special meal with minimal effort.
-
Potlucks & parties: Serve skewered or in bite-size portions — always a hit.
-
Healthy lunches: Quick to reheat and keeps you fueled for the afternoon slump.
Part 7 — Final Takeaways, More FAQs & Wrap-Up
Key Takeaways
Cooking 10 Minute Honey Garlic Shrimp is all about balance:
-
Speed matters: Shrimp cook in minutes, so keep your pan hot and ingredients ready.
-
The glaze is everything: Honey, garlic, and soy (or tamari) create that irresistible sticky-sweet finish.
-
Versatility wins: Serve with rice, noodles, salads, wraps, or even tacos.
-
Diet-friendly tweaks: From gluten-free to keto, this dish easily adapts to your lifestyle.
-
Meal prep magic: Store leftovers in the fridge or freezer and reheat gently for easy lunches.
At its core, this recipe isn’t just about dinner — it’s about creating a delicious, healthy meal without stress.
Additional FAQs
Q11 — Can I make honey garlic shrimp without soy sauce?
Yes! Use tamari, coconut aminos, or even a splash of balsamic vinegar for depth of flavor.
Q12 — How do I know when shrimp is perfectly cooked?
Shrimp should turn pink, curl into a “C” shape, and become opaque. If they curl into an “O,” they’re likely overcooked.
Q13 — Can I bake honey garlic shrimp instead of pan-frying?
Absolutely. Spread shrimp on a sheet pan, brush with sauce, and bake at 400 °F (200 °C) for about 8–10 minutes.
Q14 — How can I thicken the honey garlic sauce without cornstarch?
Arrowroot, tapioca starch, or even reducing the sauce longer over heat will naturally thicken it.
Q15 — Is honey garlic shrimp kid-friendly?
Yes! Most kids love the mild sweetness of honey and the tender shrimp texture. If your child dislikes garlic chunks, mince extra finely or swap for a pinch of garlic powder.
Internal Link Recommendation
By the way, this dish pairs wonderfully with other comforting meals like the Garlic Parmesan Chicken Pasta — a creamy one-pot delight that also works with chicken, shrimp, or plant-based alternatives.recipesnana
Conclusion
There you have it — a complete guide to 10 Minute Honey Garlic Shrimp. With minimal ingredients, simple steps, and endless serving possibilities, this dish proves that fast food can be healthy, flavorful, and downright irresistible.
Whether you’re whipping up a weeknight dinner, meal-prepping for busy days, or cooking to impress, this recipe’s got your back. So grab that skillet, let the garlic sizzle, and watch how quickly dinner transforms into something crave-worthy.